• Welcome to the Checkmate Community Forums forums.

    You are currently viewing our boards as a guest which gives you limited access to view most discussions, articles and access to our other FREE features.
    By joining our free community you will be able to:

    » Interact with over 10,000 Checkmate Fanatics from around the world!
    » Post topics and messages
    » Post and view photos
    » Communicate privately with other members
    » Access our extensive gallery of old Checkmate brochures located in our Media Gallery
    » Browse the various pictures in our Checkmate photo gallery

    Registration is fast, simple and absolutely free so please, join our community today!

    If you have any problems with the registration process or your account login, please contact support by clicking here or by using the"contact us" link at the bottom of the page.

Stringer repair (winter project)

Diplomat82

Well-known member
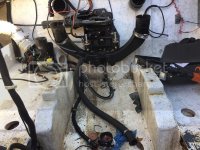
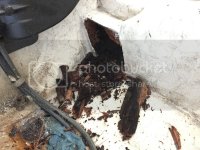
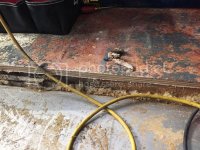
Well, when I bought my 2000 Persuader last month I knew I had a small area in the engine compartment that was rotted. It was the crossmember right behind the tank and I had a feeling that it might have gotten into one of the stringers.

I got the boat for a great price so I wasn't to worried about the cost to fix it.

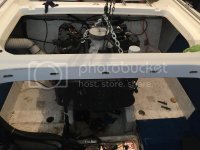
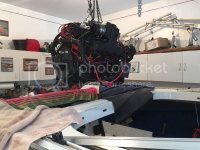
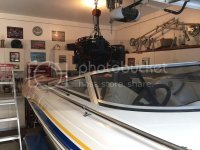
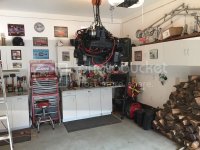
In order to repair it right I knew the engine needed to get pulled. That's what I did today. Everything went smoothly (except for one fuel injector that I broke) and now I'm ready to start tearing into the floor and also removing the fuel tank.

It does look like both stringers have some rot in them so I'll need to chase it back to good wood. I plan to remove the massive engine mount structure and replace it with a beefed up stringer with a bolt through aluminum angle. That way I can also bolt the mount to the angle instead of lag screwing them. I believe PowerQuest and a few other manufacturers did this.

Will anyway that's where I'm at....stay tune.
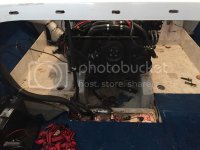
image_1.jpg

image.jpg

image_7.jpg

image_2.jpg

image_4.jpg

image_3.jpg

image_6.jpg

image_5.jpg
 
Doesn't look like you have to go too far removing bad material.

What do you think contributed to the rot?

Good time to replace carpet and be ready for spring.

Looking forward to following thread.
 
I think the previous owner let about 6" of water sit in the bilge and it soak right into the crossmember. Then it wicked into the stringers.
Everything 6 to 8 inches back sounds good tapping with a screwdriver, but I'm preparing for the worst.

I was hoping to cut out just a little bit of the floor at a time but the fuel tank is screwed into the stringers. So I have to cut out a 4 to 5 foot chunk of the floor.
 
Good Luck with your repair!!

Unfortunately I dont know the first thing about repair or engines, I envy you guys (or girls) that can repair your own equipment. It costs me a lot when my CM needs winterization or repairs.. :brickwall::brickwall::brickwall:
 
It costs me a lot when my CM needs winterization or repairs..
Yeah. I can do the mechanical work, but I don't have the space/skill set to do any sort of major fiberglass project on a boat.

Lately, I've found it a lot easier (but certainly not less stressful) to just whip out the plastic. Between my work schedule and my age, neither creates a heck of a lot of enthusiasm for that any more.
 
Had a couple of hours today to poke around. Found that both motor mount supports are totally shot. Can't believe that the motor didn't move and break something.
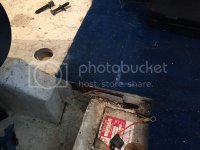
Looked at the port stringer or should I say looked at where the port stringer should be. Pretty much non-existent.
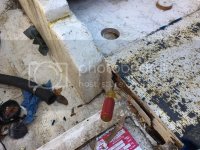
The good news was that the transom isn't affected at all. Looks like Checkmate fiberglassed the transom separate from the stringers. They also left about 1/4" gap between stringer and transom.
I wanted to do more but forgot my circular saw at home.
Tomorrow if I have time I'm going to cut the floor out over the gas tank and see how far up the rot goes.


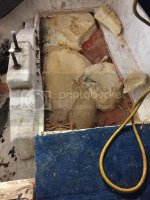
IMG_2064.jpg

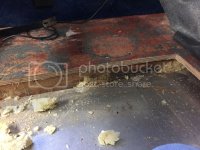
Foam wasn't even wet or heavy. I wonder if they use something different then they did in the 80's

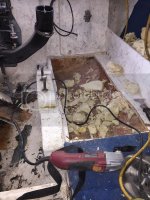
IMG_2068.jpg

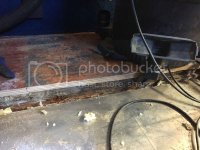
Stringer was pretty much gone

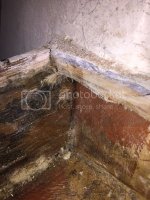
IMG_2067.jpg

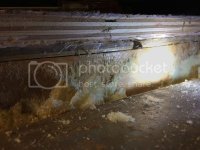
Gap between stringer and transom


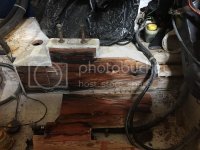
IMG_2099.jpg

Motor mount assembly was completely soaked and spongy


IMG_2062.jpg

The back part of mount assembly just fell apart.
 
Ugh. Not the sort of surprises I want to see. But you're deep into this, might as well (MAW), keep poking and cutting.
 
D82 make sure you get the exact measurements for the motor mounts. When Brian(yellowfiero88) and I rebuilt his enchanter we used oak for the motor mounts. The core was shot, so over half was replaced plus new stringers and floor. Good luck!!
 
Ugh. Not the sort of surprises I want to see. But you're deep into this, might as well (MAW), keep poking and cutting.

The bad thing about this is that I need to pull the tank. It is screwed into the stringers and is long. It pretty much ends at the base of the ski locker.
 
D82 make sure you get the exact measurements for the motor mounts. When Brian(yellowfiero88) and I rebuilt his enchanter we used oak for the motor mounts. The core was shot, so over half was replaced plus new stringers and floor. Good luck!!

How do I figure out if the core is bad? I didn't even know it had a core.

I'm also struggling with how to rebuild the engine mount support. I really like the idea of through bolting an aluminum angle to the stringers. Very clean and less places for rot. (Plus I've always hated the idea of running lag screws into the wood). But in order to do that I would have to increase the depth and thickness of the stringers back there.
Right now I can't figure out why the original motor mount support assembly needs to be that bulky.
 
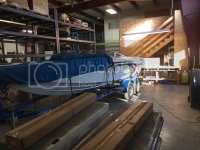
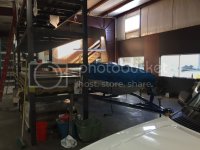
I'm lucky to have a buddy who is letting me use a portion of his shop to work on my boat.

IMG_2101.jpg

IMG_2103.jpg


So today I had about an hour to work on the boat.
IMG_2105.jpg

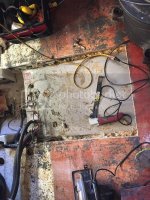
Took out about 30" of the center floor to get a look at the stringers.


IMG_2106.jpg

Port side stringer looked good about a foot in.


IMG_2110.jpg

The wood plates attached to the stringer sides to hold in the tank are all toast.


IMG_2108.jpg

Can't figure out what's going on here. Looks like maybe the stringers were short and they added a plywood strip to the tops. Then glued the floor on with what looks like 5200.


IMG_2113.jpg

Starboard side was bad all the way up, so I cut out another 18" of the floor.


IMG_2112.jpg

Still bad! Ughh!


IMG_2115.jpg

Looking up to where the ski locker and the bow seats begin the wood still looks bad.


I guess my next step is to drain the tank and pull it out. Then I can start cutting the rest of the floor out. Man do I hate cutting up a good floor!
 
Looks like you're heading down the path of a complete strip and re-do. MAW cut it all out and build it right.
 
i would leave as much good wood/glass as you can, it will save you a TON of work if you just cut and replace enough to make a good repair VS ripping it all out.
 
How do I figure out if the core is bad? I didn't even know it had a core.

I'm also struggling with how to rebuild the engine mount support. I really like the idea of through bolting an aluminum angle to the stringers. Very clean and less places for rot. (Plus I've always hated the idea of running lag screws into the wood). But in order to do that I would have to increase the depth and thickness of the stringers back there.
Right now I can't figure out why the original motor mount support assembly needs to be that bulky.

Not sure how far you have gotten but just a little info, if you follow Rob B's advice of using oak for the motor mount bed ( great advice) make sure you use white oak. Red oak rots OUT MUCH faster. White is rot resistant.
 
Between the flu, sinus infection and a bad back these last couple of months have been really trying.
I have been slowly working on the boat with a couple of surprises.

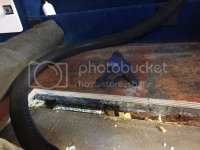
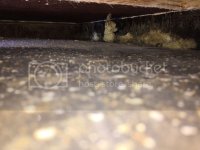
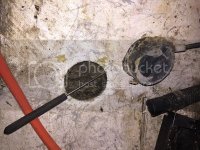
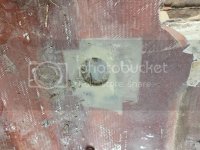
I did find a small portion of rotted core where someone did a s**ty job installing the depth finder transducer. I cut out the area until I hit good core, ground it down, dried it and filled the small area in with thickened epoxy and a layer of cloth.

ADD51168-7CC9-4B8C-8C5D-C38F3582F386.jpg

4296292A-BF4E-45B1-A74E-6E96CAB4B84A.jpg
 
Back
Top