• Welcome to the Checkmate Community Forums forums.

    You are currently viewing our boards as a guest which gives you limited access to view most discussions, articles and access to our other FREE features.
    By joining our free community you will be able to:

    » Interact with over 10,000 Checkmate Fanatics from around the world!
    » Post topics and messages
    » Post and view photos
    » Communicate privately with other members
    » Access our extensive gallery of old Checkmate brochures located in our Media Gallery
    » Browse the various pictures in our Checkmate photo gallery

    Registration is fast, simple and absolutely free so please, join our community today!

    If you have any problems with the registration process or your account login, please contact support by clicking here or by using the"contact us" link at the bottom of the page.

Rewiring the Enforcer

Rob B

Moderator
Staff member
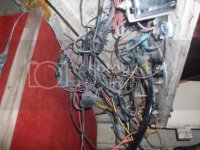
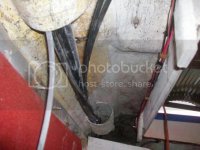
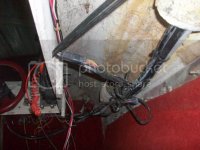
I'll probably have questions as I start the process of rewiring the Enforcer. My first question is the navigation lights. The black wire on the navigation lights was tied into the battery by the PO? I'm not sure if this is correct since the switch on console is wired to a fuse box/ block underneath the dash. I'm guessing that the lights shorted out so it was wired different. Here's some pictures of the cluster I pulled out from underneath the dash and gunnells and some others as well.

The cluster fcuk:
100_2162.jpg

One of the batteries, have'nt added the other yet
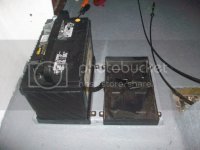
100_2174.jpg

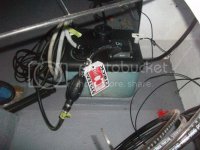
The oil tank
100_2173.jpg
 
Hey Robbie, I just spent the last hour under the dash on the playmate. I feel your pain, it to is a fcuking mess. I think I am going to rip it all out and start from scratch. I am also going to redo the dash an make it a little different. Mine must have had a starting wire go bad so the PO used speaker wire from the key to the solenoid. Instead of ripping the two wires apart, he just taped one of them off for a spare!!
 
I had wire cut and tied off, on old speedometer tube cut and rolled up. Oh forgot to mention two wires shorted out and melted together underneath the gunnell.:shakehead: I went back out to look at the nav lights, looks like the PO cut the ground to tie another in right underneath the dash/console. That wire was also cut and tied. I'm still trying to figure out why the ground was cut on the nav lights near the stern then a ground wire was added to the battery. Damnest thing I've ever seen. Oh also forgot the yellow wire for the gas sending unit. WTF!!!!!!
 
Google standard boat wiring color codes and spend the time (and $$$) to do it right. I mean, the right wire size and the right color, tinned wire zip tied every inch or so, justpefect like you are looking at a million dollar boat-this takes time and thought. My Check is OK as is, But the Southwind I had b4 was really messed up. I think I had 40 hours under the dash, but I am slow. I actually had a Baja 16ss that had a house light switch for the bilge Pump.
 
Google standard boat wiring color codes and spend the time (and $$$) to do it right. I mean, the right wire size and the right color, tinned wire zip tied every inch or so, justpefect like you are looking at a million dollar boat-this takes time and thought. My Check is OK as is, But the Southwind I had b4 was really messed up. I think I had 40 hours under the dash, but I am slow. I actually had a Baja 16ss that had a house light switch for the bilge Pump.

Thanks Old Navy. I've got the standard color codes downloaded and printed out. I'll post them soon. Also bought the right wire sizes and color from a www.genuinedealz.com
 
My Pulse has some issues under the dash, but my trick neck does not allow me to tend to them. Pretty wires are not worth a week or so of pain, but I give it to you guys that have the time and patience.
 
My Pulse has some issues under the dash, but my trick neck does not allow me to tend to them. Pretty wires are not worth a week or so of pain, but I give it to you guys that have the time and patience.

Trust me, I wouldn't be underneath the dash either, but I found out why my lights, bilge etc would work then just quit for no reason.:( The only good out of this is the stereo system and all the gauges work!!!:bigthumb:
 
Take every wire out and toss them in the trash along with the fuse block and start from scratch. Bring it to me I will do it for you
 
Trying to understand C/M 's wiring is like trying to understand heath care bill.:shakehead:
Like someone said rip it out and start over eek
 
Trying to understand C/M 's wiring is like trying to understand heath care bill.:shakehead:
Like someone said rip it out and start over eek

LOL!!! That's the damn true, both the wiring and obamacare.:D I'll post a picture underneath the dash.
 
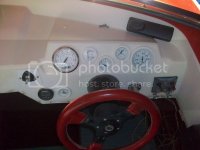
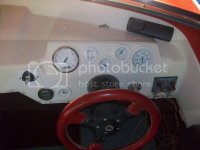
Here's some pictures of my cluster underneath and top of the console. On the console left side of the picture is the control for the bennett trim tabs that I didn't put back on, that gets removed. The depth sounder and the accessory switch will be replaced.

The cluster
100_2180.jpg

The console
100_2183.jpg

The driver side
100_2151.jpg
 
I found some useful information on rewiring a boat and thought I would pass it on.

Wiring codes: http://www.acbsphl.org/Tips_and_hints/ABYC_Wiring.htm


boatwiring2001.jpg

Adding a second Battery
First -- there are two electrical systems on a boat. 1) the engine harness runs from the engine to the front of the boat. It gets its power from the two large battery cables connected to the start battery. That power system feeds the ignition switch and powers the gauges when the key is turned on. So issue #1 in your plan is you do not disconnect gauges from that circuit put them on another battery. You have no way to turn them on and off unless you add yet another switch which is simply a nonsense approach. Putting other stuff on the "house" battery is certainly a valid plan but then you don't need the switch to do that. 2) The second system in the boat is the two smaller wires that run to the circuit breaker or fuse panel in the boat. It is this circuit that powers everything else in the boat. Now then, there are many ways to wire a switch but it all boils down to "protecting the start battery" is it not? Well then, the best way to do that is wire everything to the COM terminal on the switch. You then have the option of switching to BAT 2 when parked which prevents draw on the start battery. Underway you can set the switch to 1, 2, or both to charge the selected battery or batteries.
Here is a simple wiring diagram for a dual battery switch. All loads get connected to the COM terminal. Note that all cables in this diagram must be the same gauge or larger than the regular battery cables. Wires feeding the loads need only be sized appropriately for that load.

StandardBatterySwitchWiring.png
 
I found some useful information on rewiring a boat and thought I would pass it on.

Wiring codes: http://www.acbsphl.org/Tips_and_hints/ABYC_Wiring.htm
Good find on the color codes:bigthumb:. I spent a lot of time going through manuals on the engine wire color code.

Hey Rob, if you need a real nice switch panel, LMK I will send you my very special one for free, just pay shipping:poke: It does have all the original switches in it and may be worth a lot of money some day:lol:
38218570040_large.jpg
 
Charlie Chan if I ever saw it!! If that were a road map - You would be lost forever!!:pissed:

The good thing is you can actually enjoy ripping it out to rewire it can only be described as Blissssss:thumb:
 
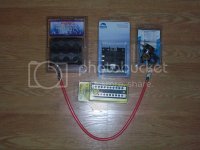
I had the day off yesterday due to the rain out for the guys in the field/shop. So I started sorting thru the electrical nightmare the PO was kind enough to leave me. I got the control cables, hydrualic lines and the throttle/shifters cables straighten out and tied up. I've got all the new electrical wires, connectors and other misc stuff that I need to rewire the boat. I'll order a new accessory switch and fuse block shortly. Here's a picture of the electrical goodies I've bought so far along with new batteries not pictured.

100_2179.jpg
 
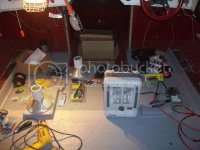
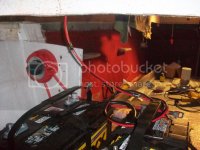
I got a few more electrical items the other day hopefully this should be all I need. Today I got most of the new wiring routed from the stern back to the dash. I ended up rewiring the stern light because the wire was cut in several places, both batteries are in, perko switch mounted and the cables are routed to the batteries. Once the motor is mounted I'll finish up the electrical in the stern. Next up is tackling the mess under the dash as well as replace the fuse block and gang buss. Here's some pictures:

100_2192.jpg

The mess I created on the floor
100_2193.jpg

The batteries
100_2195.jpg

perko switch
100_2196.jpg

The bilge pump and gas tank wired
100_2199.jpg
100_2200.jpg

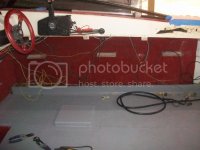
Under the gunnel all nice and neat
100_2205.jpg

100_2206.jpg

Here's the wiring hanging down that was routed from the stern to the dash. Still need to finish routing the wire to the new switches and fuse block.
100_2203.jpg
 
Back
Top