• Welcome to the Checkmate Community Forums forums.

    You are currently viewing our boards as a guest which gives you limited access to view most discussions, articles and access to our other FREE features.
    By joining our free community you will be able to:

    » Interact with over 10,000 Checkmate Fanatics from around the world!
    » Post topics and messages
    » Post and view photos
    » Communicate privately with other members
    » Access our extensive gallery of old Checkmate brochures located in our Media Gallery
    » Browse the various pictures in our Checkmate photo gallery

    Registration is fast, simple and absolutely free so please, join our community today!

    If you have any problems with the registration process or your account login, please contact support by clicking here or by using the"contact us" link at the bottom of the page.

1975 V-Mate II Restore

My wife doesn't bother me about money in the boat or even late night beer buddies. She knows the consequences of violating the rules of the he-man woman haters club. Her and her friend thought once they'd be cute and unplug the garage fridge (only beer and full) so in return I grabbed some quick set 5200 and glued her toilet seat up.

Ok enough of that.. Yes your fiberglass method is accurate, laminiating resins require wax to cure, so use that on multiple layers, finishing resins have the wax already in them, so if your neat you won't have to sand in between layers. The final layer of glass you'd use the finishing resing. They have to be the same type, don't mix and match.
 
Update on progress

Not much has been done other then reading and researching. I did spend time yesterday working on getting the boat level on the trailer and supported. Also have been price comparing supplies at different places i.e. US Composites, Merton's, etc. There is a place http://www.fibreglast.com in Brookville, OH that is only fifteen minutes from where I live. I stopped in for a catalog on Thursdasy and asked if I could order their product and pick it up there and they said no, it must be shipped since they are an online distributor. I guess if I'm going to pay for shipping, I might as well go with the lowest price with US Composites and Merton's.

Also, I've changed my mind at least three times each day for the past week whether I'm going to use polyester resin or epoxy resin. Even though it's more expensive, I'm going to go with epoxy. I intend on keeping this boat for a long time and I don't want to chance ever have to fix anything structural on this boat again.
 
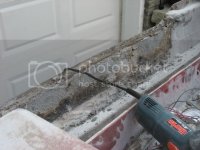
Okay, I've decided that I'm going to do most of the repairs with epoxy. It seems pretty easy to work with so far. Some pictures of progress:

IMG_2727.jpg
Grinding...where the fun is at!

IMG_2734.jpg
Same of my wonderfully rotted core

IMG_2733.jpg
You can get a sense of what I'm up against

IMG_2820.jpg
Balsa replacement bedded in an epoxy paste with a layer of 10oz cloth glassed in on top. I'm going to lay a full sheet of 38" wide 1708 over this to complete it.

IMG_2822.jpg
The final section that needs replaced. I am going to do that after I get the transom replaced while the top is off or easy access.

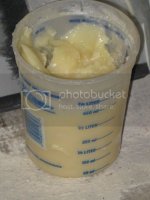
Tip to those thinking of using epoxy, don't work with more then 9 ounces of epoxy especially when adding a thickener to turn it into paste because it WILL set up on you super fast. It will get real hot and sets in seconds.
IMG_2737.jpg
I didn't listen to the advice that was given to me and I have about a pint and a half stuck in a container to prove it.
 
When I did my transom I used this stuff called sea cast . Some people frown against it but Ill tell ya it will never have to be fixed again thats for sure . My dad removed the motor and cut the cap off the transom with a cut off wheel and dug ALL the wood out of the transom with a big pry bar . And after a box of band aids later he was glassing a piece of matt in the bottom so the sea cast wouldnt run up into the floor area . I had to holes in the back of the boat too where the motor pushed in to the transom . He fixed that too and re gelcoated the transom pad . Black but looks good . All was done with out removing the deck or cutting into the back of the boat . He did a awesome job and did it it in two days. kept him busy while I was at work and out of the fridge lol :rof:.

Picture157.jpg

Picture151.jpg

If I can find the pics of him doing the work ill post thos up too .
 
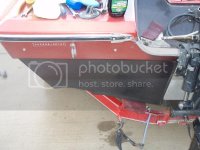
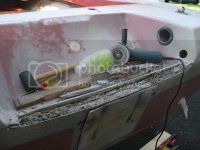
Today, I was motivated to remove the cap so I could start work on the transom. While trying to remove the spashwell from the transom, I discovered something that was a little shocking (well not with this boat). It looks like someone poured mortar or concrete onto to fill in for some rotted wood? I am assuming this isn't factory or a fix like seacast? I snapped some pictures for everyone's viewing pleasure.

IMG_2829.jpg
I did cut the top of the fiberglass out so I could pry the inside of the splashwell way from the transom.

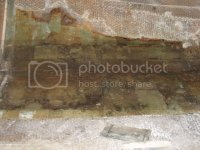
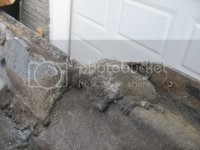
IMG_2830.jpg
Little and big chunks of mortar/concrete

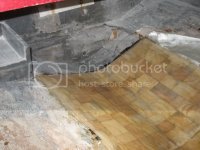
IMG_2833.jpg
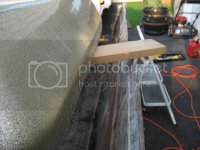
Now ready for transom removal for next weekend (hopefully)

IMG_2834.jpg

IMG_2835.jpg

IMG_2836.jpg
You can see a blob of this stuff still in there
 
Not sure what the rock stuff is called but my trimate had the same thing when I cut the cap off the transom. Hard as rock. Not sure why it was there. Boat is looking good.
 
My Trimate had it too . It wasnt all down with the wood tho just up under the splash well ? I have know Idea of why its there for like what its purpose is .
 
Last edited:
Wow you go the whole thing out . Mine wasnt done that way just removed the wood and left the glass all intact . Poured in that sea cast and all fixed lol .
 
That concrete stuff that you found is a putty that the factory uses when they join the two halves of the boat together. Helps create a good barrier between the splashwell and top of the transom for motor installation. Boat looks great, I'm getting towards the tail end of a restoration myself (although it won't be on the water this year). Keep up the good work!
 
So I was just looking at the pics of yours...What are the differances between the v-mate II and the v-mate I? Ours look about the same, same color , same motor, same seats....
 
So I was just looking at the pics of yours...What are the differances between the v-mate II and the v-mate I? Ours look about the same, same color , same motor, same seats....

The only difference I believe is the length and weight. I have a hard time seeing the difference in pictures.

Did you do to Ceaser's Creek on Saturday?
 
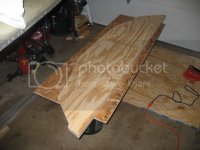
Did some work this weekend on the transom. I have a new one built by gluing two pieces of 3/4" ply together with PL Premium then I traced the outline from the old transom. I cut it out and re-drilled the holes for the tie-down hooks but I haven't coated with resin or glass yet. It was going to happen yesterday after I was done grinding/sanding the transom skin but I had to stop since I hurt my eye.

The wind blew the dust sideways between my eye and my safety glasses and it got me. Well, after the trip to urgent care, the doctor said it was a small scratch in my upper cornia, nothing major. Talk about painful. I guess it was a newbie mistake for not wearing goggles.

Anyways, I have some more sanding to do in the boat and a light sanding on the wood and the transom and all should be ready for some resin. I'll post pictures a little later of the progress.
 
The only difference I believe is the length and weight. I have a hard time seeing the difference in pictures.

Did you do to Ceaser's Creek on Saturday?


Yeah I went it was way better than eastwood or CJ. For the good first 2 hours the water was just freaking flat. It was awesome.:rof:
 
Back
Top