• Welcome to the Checkmate Community Forums forums.

    You are currently viewing our boards as a guest which gives you limited access to view most discussions, articles and access to our other FREE features.
    By joining our free community you will be able to:

    » Interact with over 10,000 Checkmate Fanatics from around the world!
    » Post topics and messages
    » Post and view photos
    » Communicate privately with other members
    » Access our extensive gallery of old Checkmate brochures located in our Media Gallery
    » Browse the various pictures in our Checkmate photo gallery

    Registration is fast, simple and absolutely free so please, join our community today!

    If you have any problems with the registration process or your account login, please contact support by clicking here or by using the"contact us" link at the bottom of the page.

1975 V-Mate II Restore

That transom is looking better and better all the time . I know your a ways off still on the interior but any idea of how you are going to set it up ? or you going to keep it original ?

b.r.o.,

I want to thank you for putting this thread together. I've been following along for some time now and thought it time to post a word of thanks. :)

I always enjoy these resto-type threads, so thanks for taking the time to put it all together.

I'm sure your thread will help many other members long into the future.

Keep up the great work, I'm looking forward to seeing the final results - hopefully on the entrance page. :thumb:

-Chris

Thank you guys for the kind words. I don't know if this boat will ever reach front page status but I'll try my hardest. Thanks for keeping up with the thread and offering encouragement.

I don't know about the interior yet but I'm inclined to say probably not original. I do think I'm going to add a bench seat in the back which I think would be different and most of everything else will probably stay the same.
 
Cant wait to see those pics of her out on the water next season . well if we all get together next season we can see your work first hand . :thumb:
 
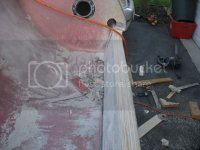
I then added some scrap 1708 to to secure the brace at the bottom.
IMG_3085.jpg

This is how much it pulled straight...I don't have a before picture to compare
IMG_3086.jpg

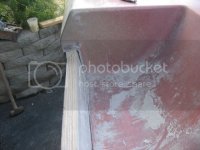
Sanded the tabbing down and rounded the edge of the brace
IMG_3087.jpg

Then added 10oz. cloth over all of the brace and transom for that matter. This isn't really for structural support but rather the pretty up the job and to seal the edge of the brace.
IMG_3089.jpg

As for the delamination, I'm going to leave it as is. It doesn't have any give in it like there is an air pocket and the transom was encapsulated prior to installation. If there are any worries, it would be structural and I don't think that area will be of concern for me as it's well glassed around the sides and bottom. I do plan on putting boating putty or what not in that area to seal the cap/splashwell in so it should be sound.
__________________
leftleftrightright.png
 
mortar stuff

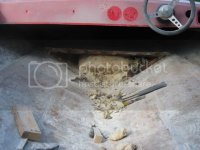
hey guys, just to let you know my 76 vmate had the same stuff in the transom also, looked like "quickcrete" so i would say it is original, my boat had never had the cap off untill i took it off, and also my 16 ft baja has the same stuff in the transom also. very unusual. i am gonna do the same with my mate as well so keep up the good work and post pics! good luck
 
.....my 76 vmate had the same stuff in the transom also, looked like "quickcrete" so i would say it is original, my boat had never had the cap off untill i took it off, and also my 16 ft baja has the same stuff in the transom also. very unusual.


The reason that filler is there is because it would be darned near impossible to have the splashwell and transom match up perfectly for every boat being built, because of small variabilities from one hull or cap to the next. The resulting void needs to be filled with something with good compressive strength so that the rear of the splashwell doesn't collapse when you tighten the motor mounting bolts, as well as to spread the thrust loads from the engine.
 
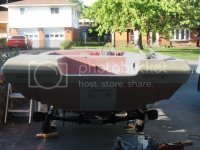
Well, I am trying to pick up wood but with not having a truck, makes it quite difficult. My neighbor's son has one and said he'll help me next week so I should be able to start my stringer and deck replacement the I'll be able to move on to my bench seat, etc. Anyways, I put the cap back on the hull which was quite the task since the transom was out-of-whack from being bad for so long. I ended up having to cut into the splashwell to get it back on to fit. It just requires additional glassing which will probably be better in the long run where it will fit better around the transom.

IMG_3139.jpg

IMG_3140.jpg

IMG_3145.jpg
 
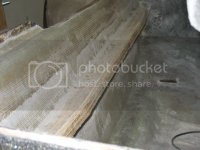
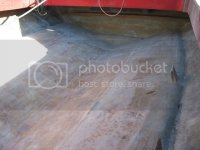
After that, I got in and did some sanding on my glass work over the balsa core so I don't have to deal with it other then cleaning and glassing with 1708.

IMG_3144.jpg

Then I went the the bow and removed my bulkhead to have better access to the foam so I could remove it. The stuff was nasty to remove but was dry. I did leave the bow deck in place just for added support until I get the new main deck and stringer in then it will be removed and replaced.

IMG_3141.jpg

IMG_3142.jpg
 
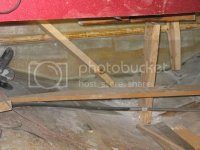
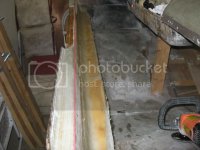
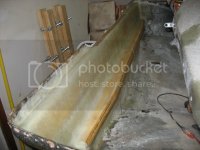
I'm in the process of gluing my stringer together and I'm making it 12' long initially so I can cut down to proper size regardless of which way I go. With that said, I am assuming that the main stringer on a V-Mate II stops at the forward bulkhead that begins the top deck (storage under the bow area). Any opinions as to whether I should continue the stringer forward to the keel area or should I leave it short as was before? Any feedback is most welcome!
 
Have not been there this year, with my boat. Been on others so far. I know dogschool goes there also. I think total there might be 5 of us that go there off the forum, maybe more.

I was only there once this year and that was a couple of weeks ago with the jet ski. You'll never see me there on a weekend though unless something good is going on since I boat on the Ohio River (when it's decent).
 
I sure wish I wasn't alergic to epoxy. It looks like it would be fun to use. Very nice job.

Only thing I would have changed would be, I'd have left the "mini transom" out. The drain hole goes there. No wood, no rot.

Nice balsa repair, nice transom work. Great job, and thank you for a great thread.


X2 Very nice job, threads great.
 
I sure wish I wasn't alergic to epoxy. It looks like it would be fun to use. Very nice job.

Only thing I would have changed would be, I'd have left the "mini transom" out. The drain hole goes there. No wood, no rot.

Nice balsa repair, nice transom work. Great job, and thank you for a great thread.
x3...he does very nice work and well documented:bigthumb:
 
I sure wish I wasn't alergic to epoxy. It looks like it would be fun to use. Very nice job.

Only thing I would have changed would be, I'd have left the "mini transom" out. The drain hole goes there. No wood, no rot.

Nice balsa repair, nice transom work. Great job, and thank you for a great thread.

By the time I'm done, I'll be allergic to it. My skin is starting to react more everytime I'm around it.

I though long and hard about the "mini transom" regarding the water/wood/rot situation and I'm hoping that I'll be able to use 5200 to secure the drain plug and tube to help seal it. In addition, I also precoated the wood with epoxy and glass so hopefully it will survive. If not, it's small enough to replace and I won't have to mess with the transom doing so.
 
Back
Top