• Welcome to the Checkmate Community Forums forums.

    You are currently viewing our boards as a guest which gives you limited access to view most discussions, articles and access to our other FREE features.
    By joining our free community you will be able to:

    » Interact with over 10,000 Checkmate Fanatics from around the world!
    » Post topics and messages
    » Post and view photos
    » Communicate privately with other members
    » Access our extensive gallery of old Checkmate brochures located in our Media Gallery
    » Browse the various pictures in our Checkmate photo gallery

    Registration is fast, simple and absolutely free so please, join our community today!

    If you have any problems with the registration process or your account login, please contact support by clicking here or by using the"contact us" link at the bottom of the page.

540 EFI Build-up Thread

Well after finally getting some time with a computer to review my datalogs from the Holley ECU, I made some modifications to the timing table and the idle settings a bit. My timing that the engine was referencing at WOT (mostly the top two rows of the pictured tables) were set very conservative. I also upped the timing at idle to smooth it out and not want to die when shifting into gear. Essentially, before max timing was 32* and I upped it to 35*. See how this goes, may take it to 36* next time depending on knock sensor logs if it is reading any pings. I also added several degrees in the midrange and lowered the rpm to max advance timing to around 3500 to gain some midrange acceleration that was lacking.

(Note: I have the small format table enabled so I don't have top make so many cell changes. It automatically converts the small table to a smoothed large table. This setup has so much ability for fine tuning it is amazing.)

Old table:
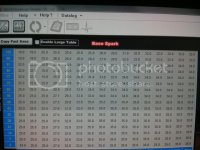
0918141036_zpsuljsi1zk.jpg

New Table:
0918140957b_zpsxkvqnhrj.jpg

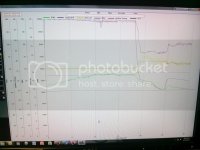
Datalog screen shot:
0918141032a_zpsxje7lsuu.jpg

The datalogging ability of this system is incredible. Each datalog contains a record of every sensor reading and every commanded parameter that can be toggled on or off, and you flip datalog pages tailored with readings for tuning at idle zones, boost controlled zones, etc. All very easy to use and navigate. When in datalog review or in real time engine running, when you look at your tuning table parameters, a glow dot appears over top of the table cell that the ecm was referencing at that particular instant. Very easy to see where changes are needed and very easy for your engine to tell you what it wants.
 
Jeez...I guess that's why your the engineer...

I'll take my Holley double pumper and occasional black transom before I could try to figure out what all those tiny boxes mean lol
You change springs and weights in a distributor......I change a number in a box. Same effect! only I have much more adjustment.
 
In the nova we don't even run weights and springs...36 at idle...36 at cruise speed...36 at 7000. What drivability issues? Lol Seems to work just fine...Hmm that gives me an idea...
I've already had a sixer maybe I should go do some tuning on the ol convincor lol

Maybe not:cheers:
 
looks great Ron. Looks like the school of hard knocks has taught you the know how to extract all power and most important the efficiency and reliability of the combo you have selected . Great read,and great boat. Can't wait to knock the top off some waves with you guys next year.:lol:
 
Well, I have been working on the motor this past weekend trying to get ready for this season. Haven't had much time or cooperative weather this year, but I'm on a roll now.

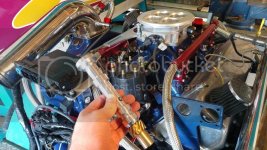
I received my new Mallory Distributor Hole Plug/Oil Pump Drive. After conversations with Alex Haxby last year, there are no real advantages on a marine engine to try and run sequential timed injection as around 4000 rpm (typical cruise rpm) and above your fuel injectors are at a constant spray anyways versus timed pulses. Horsepower wise it gives you no advantage. It is really only useful in a lot of low speed operations to gain efficiency. I will be eliminating the distributor and using this neat little plug to reduce clutter. I will not be running the bronze gear, I will bore out my current hardened gear to the larger shaft size of this .491" drive.
IMG_20150507_171029923_zpswbm5i4pw.jpg

I did figure out my low oil pressure issue. The Melling pump I installed contained only a 52 psi bypass spring (which is what I was reading on my mechanical gauge). I am changing that over to a 70 psi spring. So off the oil pan comes. I did drain the oil into a glass jar and looked it over carefully. There was no sign of metallic shavings. Although the oil was dark in color, there was no hint of metallic particles. Yay!

Tonight Smitty (Arcticfriends from OSO) is stopping over to adjust my cam timing as that is the only explanation I can think of for my lack of power. The cam must have ended up a couple degrees retarded (like the owner) causing the power loss and lazy power band. I will post tomorrow with the findings.

In preparation for cam adjustment, I pulled the valve covers, stud girdles, and loosened up all the rockers. Again, good news from underneath the covers. No unusual wear marks or debris. The valve stems have a very nice centered wear mark.

Last year on hard runs, I would get some oily mist out of my rear K&N breather and albeit nothing to be concerned about, it did make a mess in the bilge. I am getting rid of the K&N push-in breathers and am going to install a catch can breather system. I just ordered this and have found that several other marine guys have had good luck with this model for the price.
$_57.JPG


I had to make a little supplemental support that sits on the engine mounts so I could pull my oil pan and such easily. I had the bottom of the oil pan sitting on blocks over the winter to decrease the amount of sag and flex from the fully dressed engine on this 1,250 lb capacity stand.
IMG_20150507_211128611_zps7w3lezvh.jpg

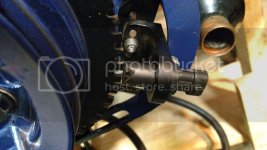
I did find one problem that I will have to fix. Apparently I did not account for enough alternator belt movement at rpm around my crank sensor. The belt did eat into the sensor a little bit but it is still fully functional. Time to make more brackets as this Holley bracket does not have enough adjustment to locate it out of harm's way.
IMG_20150510_132205963_zps8lgnxwhi.jpg

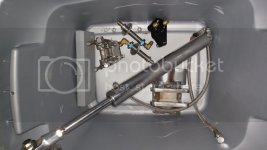
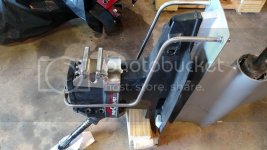
I also picked up a Mayfair Single Ram Add-on hydraulic steering kit at a decent price late this winter. I just need to get the courage to cut holes in my perfectly good transom.
IMG_20150307_154259080_zpsbwrpi7ot.jpg
 
What's the advantage of running more oil pressure?

Not blowing the engine up! I'm trying to follow the old GM addage of 10 psi for every 1000 rpm. With a rev limiter on my motor set at 6500 rpm, that means I should have 65 psi at WOT. I only have 50 now. Not enough for safety. Did it hurt anything by being low? Doesn't look like it, but it should be a bit higher.
 
Update: Smitty stopped by last night and put a degree wheel on this motor. Results: no smoking gun found. Can is exactly where it needs to be according to the can card. Back to the drawing board. Next plan of action is to reassemble, run a compression check, and get it back into the boat and do some tuning diagnostics.
 
I'm usually not an anti-technology type of guy but after watching a buddy struggle for a couple of seasons trying to get his Sonic to run right with an aftermarket EFI on it I'd steer clear of it as well. He finally gave up, plugged the injector holes in the manifold, and dropped a carb on it.
 
I'm usually not an anti-technology type of guy but after watching a buddy struggle for a couple of seasons trying to get his Sonic to run right with an aftermarket EFI on it I'd steer clear of it as well. He finally gave up, plugged the injector holes in the manifold, and dropped a carb on it.

Well, I got to the heart of the problem. Unfortunately for all you carb lovers out there, it has nothing to do with the EFI!

Stay tuned. This may take a few weeks to fix......
 
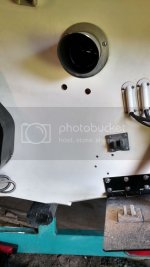
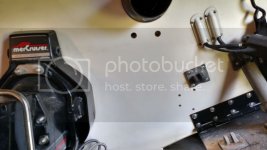
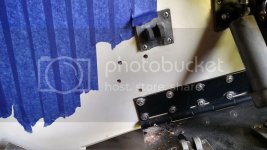
I spent last evening after work going past the point of no return........Drilling holes in my transom for steering that is! The pics are crappy and make it all look crooked but I measured 14 times before I did any drilling haha. I was sweating bullets! Now to install all the fittings and seal it up.
IMG_20150601_193743454_HDR_zpsj2zrb6lu.jpg
IMG_20150601_193738146_HDR_zpslur0lmyq.jpg
IMG_20150601_180155330_HDR_zps04a7bebr.jpg
IMG_20150527_194200152_zps7fsdpxux.jpg
IMG_20150307_154259080_zpsbwrpi7ot.jpg
 
Remove EFI, Install Carb. Problem solved.
Alrighty, bad news for all you EFI haterz on here. It wasn't the EFI's fault! It was probably the only thing that made it run as well as it did!

Diagnosis:

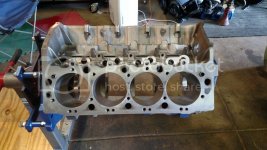
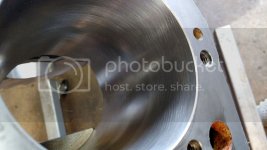
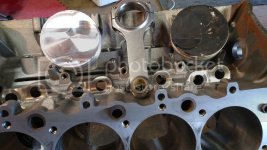
Cam was properly timed after all. Found the issue when I pulled off the oil pan to change my oil pump spring. Main issue was the rings never seated and stripped the cylinder finish off. I suspect the cylinder finish was a generic plateau hone job and not what the rings required for proper seating. Another major issue found was my piston to wall clearance was 0.010 instead of the .007 I had specified. This lead to increased piston rock further exacerbating the removal of cylinder finish. Another issue was the use of .027" compressed thickness head gaskets. The pistons were rocking enough to barely touch the deck surface of the cylinder heads but luckily caused no damage. Also found that the wrist pin bushings were on the tight side and burnished from lack of lubrication. One connecting rod bushing was even inserted wrong and the oil holes did not line up. Considering all of this, I am amazed it ran as well as it did and I am glad I tore it out and apart. The crank and rod bearings also looked rough with some debris that probably came out of the crank after start up.

The fix:

I got the heck out of Michigan and took it down to Millet's in Piqua OH who is doing Corey's LS2 and did Brent's 565. They took great care of me meeting on weekends and completing the work extremely quickly yet taking great care to find and correct the previous machine shop's oversights and mistakes. I cannot say how happy and thankful I am of their services.

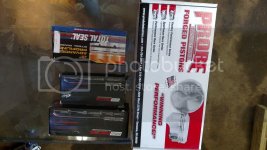
With the piston to wall clearance too large, I needed to bore .030 over and install new pistons. Also with the need to increase gasket thickness, I switched to a mini-dome piston to regain my compression. I tried to get a Icon piston like I had, but the model I needed was on back-order until September....no dice. I lucked out and found a set of 4.530" 18cc mini-dome Probe pistons in stock and ordered them. They are still the better 2618 aluminum forged alloy and I like the fact that the skirt is quite a bit larger compared to the Icon's. Due to the piston design change I had to do some minor rebalancing to the crank. Millet's polished the crank back up, rebalanced, honed the rod bushings and fixed the mis-aligned oiling holes, bored and honed the block to the proper cylinder finish specifications dictated by Total Seal for the new piston rings, and installed new cam bearings. With the advice of Millet's, I went with King Bi-metal bearings and a standard half groove.

The engine will now be a 548 cu. in. with a 10.6:1 compression ratio. That should help a little bit in the HP department. I think I was a bit low on compression before as well which wasn't helping either.

I went with a new set of Total Seal seal Advanced Profiling Series rings, remaining standard tension oil control, with a stainless steel conventional top ring with a cast iron Napier face 2nd ring. I didn't feel like spending the extra on Gapless again, nor the extra ring filing time. These are still excellent rings for the application.

I will be changing to a .040" compressed thickness head gasket but using the Cometic MLS type still. I ordered the last couple gaskets I need to finish this morning and will have those probably Tomorrow knowing how good Summit is. I should be on the water testing again hopefully in two weeks if my time schedule allows. Family obligations and a Spring semester college class have been royally kicking my azz this spring hence the late start on repairs. Assembly will be much easier because I can install complete systems and not have to fabricate/figure everything out from scratch.

Here are some preliminary pictures:
IMG_20150614_171024358_zpsv6xm8lpj.jpg
IMG_20150614_171033479_zpsposczifm.jpg
IMG_20150614_171742761_zpsgcbnxh6b.jpg
IMG_20150614_171745709_zpsp8xskz6j.jpg
IMG_20150614_171905371_zpsoosdzus0.jpg
IMG_20150614_171920693_zps8lxhoqe0.jpg
IMG_20150614_172039138_zpsxb6pngls.jpg
 
Back
Top