-
Welcome to the Checkmate Community Forums forums.
» Interact with over 10,000 Checkmate Fanatics from around the world!
You are currently viewing our boards as a guest which gives you limited access to view most discussions, articles and access to our other FREE features.
By joining our free community you will be able to:
» Post topics and messages
» Post and view photos
» Communicate privately with other members
» Access our extensive gallery of old Checkmate brochures located in our Media Gallery
» Browse the various pictures in our Checkmate photo gallery
Registration is fast, simple and absolutely free so please, join our community today!
If you have any problems with the registration process or your account login, please contact support by clicking here or by using the"contact us" link at the bottom of the page.
You are using an out of date browser. It may not display this or other websites correctly.
You should upgrade or use an alternative browser.
You should upgrade or use an alternative browser.
1975 V-Mate II Restore
- Thread starter bigredinohio
- Start date
groundloop
Active member
A thought just popped into my head about your windscreen. I can't remember if you're using epoxy or polyester resin, and you may already have it covered, but I'll throw this out just in case - the styrene in polyester resin will 'eat' that type of foam.
bigredinohio
Active member
I was planning on using wax paper on the face of the foam to prevent any reaction with the foam while using poly resin. After a get a couple of layers of glass layed, I'll remove the foam and continue building up layers.
Old Hickory
Active member
I've been pondering my gas tank and I need opinions. Should I add foam board between my gas tank and wood support or just tack the tank in place with a couple of shots of glue?
No foam and no glue. Plastic(resin) tanks use mounting brackets and mfg's don't recommend putting foam or padding between bottom or sides of the wood compartment; plastic tanks have to expand and the foam will prevent that.
No foam for aluminum tanks; but, for a completely different reason. The foam will trap water/moister against the tank causing corrosion. compulse has the right idea but use a different material. 0.25" Rubber strips 1-1.5" wide and approx 3-4" apart under the tank will prevent water from being trapped and allow air to circulate; keeping the compartment drier(the foam strips will compress over time, defeating the purpose). Do the same for the sides. Water entrapment is the achilles heel regarding aluminum tanks. They need plenty of air.
I generally have been impressed w/ the construction of my enforcer; but this is one area where they dropped the ball; like a lot of boat mfg did. Completely encased my tank in foam; which caused excessive corrosion.
Hick
bigredinohio
Active member
I've got some more work done. I switched resins this weekend from epoxy to polyester. I don't mind working with the new resin but I don't care much for working with csm.
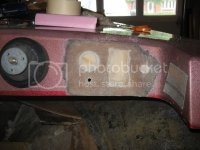
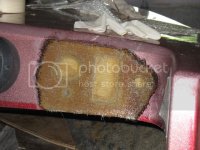
I filled in some holes in the dash by cutting out some 3/4" plywood to match the holes. I glued them in place then I came back and sanded the area and applied a couple of layers of csm and then a layer of 1708.
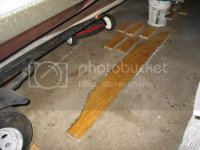
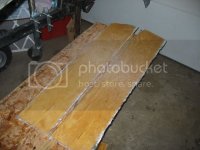
I also glassed in the pieces that will make up the base of my bench seat along with the base of my two front seats using csm.
I filled in some holes in the dash by cutting out some 3/4" plywood to match the holes. I glued them in place then I came back and sanded the area and applied a couple of layers of csm and then a layer of 1708.


I also glassed in the pieces that will make up the base of my bench seat along with the base of my two front seats using csm.


bigredinohio
Active member
I took some small bolts and reattached my hull and my cap. This is only until I finish glassing the splashwell and I'll seperate them again so I can paint. I then laid down some wax paper across the transom to keep the new glassing of the spashwell from sticking.
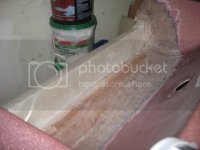
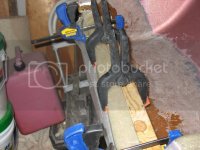
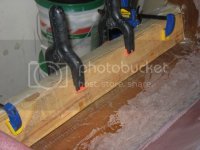
I then wetted out a piece of woven roven and applied it to the existing area and wrapping it up and over the transom. Afterwards, I clamped it down in place to make sure it would be flat. After setting up, I then wetted out a piece of csm and applied over the WR and them laid a 2x4 over the top of the transom to ensure flatness on the top. It will need some sanding before building more layers but it's a start.
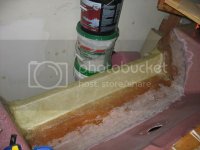
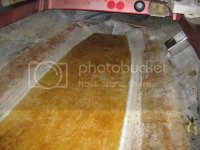
I finished up tonight by glassing my deck using csm. I will come back with epoxy and cloth and tab the edges where I used PB to fill the gap between the wood and hull.

I then wetted out a piece of woven roven and applied it to the existing area and wrapping it up and over the transom. Afterwards, I clamped it down in place to make sure it would be flat. After setting up, I then wetted out a piece of csm and applied over the WR and them laid a 2x4 over the top of the transom to ensure flatness on the top. It will need some sanding before building more layers but it's a start.


I finished up tonight by glassing my deck using csm. I will come back with epoxy and cloth and tab the edges where I used PB to fill the gap between the wood and hull.

bigredinohio
Active member
Looking good, you will love that boat when its done, I wish I still had my V-Mate II.
What kind of set up did you have on your V-Mate II and what kind of numbers did you run? Is that your old boat that's on youtube?
Here is a video of the above Vmate on it's first test drive. It looks like it is wicked fast but needs LOTS more setup and seat time The guy's camera man sucks at videos, also.
http://www.youtube.com/watch?v=pIjxttNRgYA
http://www.youtube.com/watch?v=pIjxttNRgYA
yellowfiero88
Well-known member
OMG, I think I got sea sick watching that.
bigredinohio
Active member
Here is a video of the above Vmate on it's first test drive. It looks like it is wicked fast but needs LOTS more setup and seat time The guy's camera man sucks at videos, also.
http://www.youtube.com/watch?v=pIjxttNRgYA
Yeah, I've been watching what he's been doing over at S & F. He has a thread here about that V-Mate I here but he rarely posts on it.
You are right about one thing, that camera guy sucks!
bigredinohio
Active member
It's been a while since I've updated so here goes...
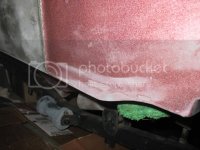
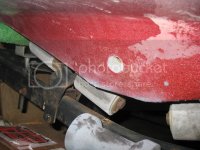
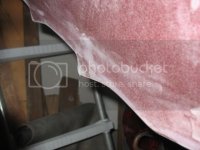
I've been sanding on the top of the deck and filling in holes. I've been wetting out a piece of CSM and place it on the backside of the hole and let it cure. I mixed up some epoxy with cabosil and milled fibers and then filled the hole. I did a light sanding with the orbital sander then came back with some epoxy and 3M bubbles to smooth the surface. Now I need to go back and sand smooth and it should be ready for final sanding and priming. Unfortunately, I have not taken many pictures but here is what I have.

I also used the epoxy, cabosil and milled fiber mixture and started building up a couple of areas on the bottom stern of the boat where some serious gouges were.
I've been sanding on the top of the deck and filling in holes. I've been wetting out a piece of CSM and place it on the backside of the hole and let it cure. I mixed up some epoxy with cabosil and milled fibers and then filled the hole. I did a light sanding with the orbital sander then came back with some epoxy and 3M bubbles to smooth the surface. Now I need to go back and sand smooth and it should be ready for final sanding and priming. Unfortunately, I have not taken many pictures but here is what I have.

I also used the epoxy, cabosil and milled fiber mixture and started building up a couple of areas on the bottom stern of the boat where some serious gouges were.


bigredinohio
Active member
Some other progress has been made with making my seat mount boxes. I pre-glassed them with poly resin and csm then glued everything together with PL Premo and ran a couple of screws to hold in place. After the PL Premo cures, I will come back, sand and glass all the interior edges with some epoxy and cloth.
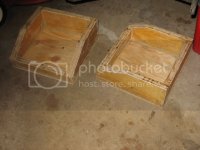
I also made a template for the piece of wood that I cut to access my core up in the bow of the boat. After transferring the template, I cut a piece of 1/2" plywood and glued it in place with some PL Premo and I used some blocks of wood screwed in place from the top to hold the wood in place. I would tighten the screw to raise the new piece of wood or loosen to lower since the 1/2" was thicker then the original piece. I will finish by sanding the seam of PL Premo, tab the edge and then glass the repair area.


I also made a template for the piece of wood that I cut to access my core up in the bow of the boat. After transferring the template, I cut a piece of 1/2" plywood and glued it in place with some PL Premo and I used some blocks of wood screwed in place from the top to hold the wood in place. I would tighten the screw to raise the new piece of wood or loosen to lower since the 1/2" was thicker then the original piece. I will finish by sanding the seam of PL Premo, tab the edge and then glass the repair area.

JT Patroni
Well-known member
Coming along real well. Do you plan on being in the water this season?
From where you are at now you could be wet in a short while.
Keep up the good work. Some of you posts in the begining helped me out
a great deal.
Jim
From where you are at now you could be wet in a short while.
Keep up the good work. Some of you posts in the begining helped me out
a great deal.
Jim
bigredinohio
Active member
Slowly but surely. I have all the primer, white paint bought along with a paint gun, filters, etc. I'm just trying to work up the nerve to get the boat down to my folks place so I can take it off the trailer and start sanding the hull. The only thing I need right now is to pick up a compressor.
My goal is to get her wet this year and to make it up to the Saginaw River takeover. I'm glad the post helped.
My goal is to get her wet this year and to make it up to the Saginaw River takeover. I'm glad the post helped.
Will30
Well-known member
Slowly but surely. I have all the primer, white paint bought along with a paint gun, filters, etc. I'm just trying to work up the nerve to get the boat down to my folks place so I can take it off the trailer and start sanding the hull. The only thing I need right now is to pick up a compressor.
My goal is to get her wet this year and to make it up to the Saginaw River takeover. I'm glad the post helped.
Sweet . Ill be there on the river I want to see it
JT Patroni
Well-known member
BRIO
Once you get to the painting stage you are on the downhill run. Up to that point it felt like I was never going to see daylight again. If I had it to do again I would just paint the bottom. Doing the gelcoat on the bottom
was more work than necessary. With the new paints available it is a lot easier and faster. You are really making progress now, keep up the good work. In the last pictures I don't see the windscreen you were mocking up. What are you going to do with that?
bigredinohio
Active member
Yeah, I am definitely going to paint the bottom of the boat. I thought about doing gelcoat until I had to start sanding on prep and that idea was quickly scratched.
As for the windscreen, I am going to go without for now. I like the idea yet I really want to get it painted and wet so I'm going to run without a windshield or windscreen. Maybe this fall I'll revisit the idea.
As for the windscreen, I am going to go without for now. I like the idea yet I really want to get it painted and wet so I'm going to run without a windshield or windscreen. Maybe this fall I'll revisit the idea.


