-
Welcome to the Checkmate Community Forums forums.
» Interact with over 10,000 Checkmate Fanatics from around the world!
You are currently viewing our boards as a guest which gives you limited access to view most discussions, articles and access to our other FREE features.
By joining our free community you will be able to:
» Post topics and messages
» Post and view photos
» Communicate privately with other members
» Access our extensive gallery of old Checkmate brochures located in our Media Gallery
» Browse the various pictures in our Checkmate photo gallery
Registration is fast, simple and absolutely free so please, join our community today!
If you have any problems with the registration process or your account login, please contact support by clicking here or by using the"contact us" link at the bottom of the page.
You are using an out of date browser. It may not display this or other websites correctly.
You should upgrade or use an alternative browser.
You should upgrade or use an alternative browser.
1975 Vmate restoration
- Thread starter Will30
- Start date
Will30
Well-known member
I see you cut most of the front lip of the battery box, nice. You won't regret that!
It was already cut before you had posted that the first time lol . I had cut it out on my trimate when I first got it . It has chase lounge seat and the battery is still a p.i.t.a to get out even with it cut . But this one shld be ok .....
Will30
Well-known member
Will30 ...wondered what type of wood you used for the stringers?
also wondering what kind of know how you and your dad has on fiberglass work or just learning as you go?
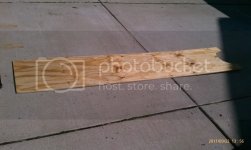
Used a 2x4 for a stringer . All that was there before was 3/4 piece of plywood .
My dad has done body work on cars for years . Ive learned from him over the years . This is the 3rd boat ive done glass work too
Used a 2x4 for a stringer . All that was there before was 3/4 piece of plywood .
My dad has done body work on cars for years . Ive learned from him over the years . This is the 3rd boat ive done glass work too
thats awesome...i want to learn learn learn... but just cant find the "right" project to try myself....
i'm enjoying the build so keep up posting the pics.
cturboaddict
Active member
You know me bro~thats awesome...i want to learn learn learn... but just cant find the "right" project to try myself....
i'm enjoying the build so keep up posting the pics.
Youll have to get dirty to learn the most. Find a boat bud, all these guys here and on the other sites~Will help you out.
Will30
Well-known member
thats awesome...i want to learn learn learn... but just cant find the "right" project to try myself....
i'm enjoying the build so keep up posting the pics.
This is the first boat ive seperated the the top from the bottom . but its not all that bad and has been a fun expirence . And its something I dont mind spending money on . I still have another Checkmate I have to do something with when this one is finished
Jetmate
Well-known member
Nice
lovin' the deck on jackstands
It is a heavy deck LOL... But seriously you guys are doing a great job, been looking forward to seeing your resto. Keep up the good work!
'72' Jetmate:
http://checkmate-boats.com/forums/showthread.php?t=14018
lovin' the deck on jackstands

It is a heavy deck LOL... But seriously you guys are doing a great job, been looking forward to seeing your resto. Keep up the good work!
'72' Jetmate:
http://checkmate-boats.com/forums/showthread.php?t=14018
Will30
Well-known member
lovin' the deck on jackstands
It is a heavy deck LOL... But seriously you guys are doing a great job, been looking forward to seeing your resto. Keep up the good work!
'72' Jetmate:
http://checkmate-boats.com/forums/showthread.php?t=14018
Made it alot easier to work on with it off the ground lol .
Tx91z28
Well-known member
Made it alot easier to work on with it off the ground lol .
it really does, we used jack stands to hold the deck up when we were doing the body work and hole filling before paint
Tx91z28
Well-known member
This is the first boat ive seperated the the top from the bottom . but its not all that bad and has been a fun expirence . And its something I dont mind spending money on . I still have another Checkmate I have to do something with when this one is finished
just wait until you put it back together! its amazing how much stuff shifts.... i would have left some holes to line the deck and hull up....
out deck seemed too wide when we put it back together, it was NOT fun getting it all to fit again.
Will30
Well-known member
just wait until you put it back together! its amazing how much stuff shifts.... i would have left some holes to line the deck and hull up....
out deck seemed too wide when we put it back together, it was NOT fun getting it all to fit again.
Ive had the top on and off a few different times and it still fits real snug . But I havent had mine off the trailer yet either .... That wont be still spring
yellowfiero88
Well-known member
If I ever do another one, it will be a gut, flip and paint bottom to seam, then flip it back upright. From there, separate and do the floor and any wood resto, paint the top, join the two halfs, install the interior and re-rig. Doing it this way makes the flip easier than with all that rotten wood/wet foam or heavy new wood guts! JMO  Then again, a couple extra feet of boat makes a huge difference on weight for the flip.
Will30
Well-known member
If I ever do another one, it will be a gut, flip and paint bottom to seam, then flip it back upright. From there, separate and do the floor and any wood resto, paint the top, join the two halfs, install the interior and re-rig. Doing it this way makes the flip easier than with all that rotten wood/wet foam or heavy new wood guts! JMOThen again, a couple extra feet of boat makes a huge difference on weight for the flip.
This boat Brian really isnt all that heavy . Its alot lighter now than it was when I brought it home . Me and my dad have picked it up off the trailer to reposition it and it wasnt that bad at all .....
yellowfiero88
Well-known member
How long is the Vmate? It took 4 people and leverage from a tree and truck to flip the enchanter, 6 to flip back upright. It was rough on the back to say the least!!
Will30
Well-known member
How long is the Vmate? It took 4 people and leverage from a tree and truck to flip the enchanter, 6 to flip back upright. It was rough on the back to say the least!!
Its only 15' 4" weight some where between 500-600 lbs .


