-
Welcome to the Checkmate Community Forums forums.
» Interact with over 10,000 Checkmate Fanatics from around the world!
You are currently viewing our boards as a guest which gives you limited access to view most discussions, articles and access to our other FREE features.
By joining our free community you will be able to:
» Post topics and messages
» Post and view photos
» Communicate privately with other members
» Access our extensive gallery of old Checkmate brochures located in our Media Gallery
» Browse the various pictures in our Checkmate photo gallery
Registration is fast, simple and absolutely free so please, join our community today!
If you have any problems with the registration process or your account login, please contact support by clicking here or by using the"contact us" link at the bottom of the page.
You are using an out of date browser. It may not display this or other websites correctly.
You should upgrade or use an alternative browser.
You should upgrade or use an alternative browser.
540 EFI Build-up Thread
- Thread starter Gimme Fuel
- Start date
Gimme Fuel
Well-known member
Natives are getting restless....you know film @ 11 and s@#!
Haha! As am I! We finally made some progress tonight. It has been a scheduling nightmare for past few weeks. Finally got a couple hours to deliver parts and set block up on the stand. Washed the bored and ckeaned out the oil galleys to be sure. Also got the pistons assembled to the rods. Dang spiro locks makes for tedious work. Here is the start on the stand!


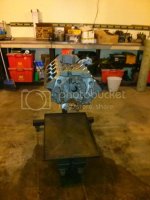
Stay tuned sports fans.......things are finally moving!
DropTop5.0
Well-known member
You've got some big holes to fill. Lookin good.
Problem Child
Well-known member
Gimme Fuel
Well-known member
I was told progress after college?

Tell that to the weather in this crappy State! Finally warm enough here to do bilge prep.
I was supposed to work on it Sunday but my builder got home from work and fell asleep in his chair....haha. The filing of piston rings begins at 6pm tonight!
Kurtster
Well-known member
Tell that to the weather in this crappy State! Finally warm enough here to do bilge prep.
I was supposed to work on it Sunday but my builder got home from work and fell asleep in his chair....haha. The filing of piston rings begins at 6pm tonight!
Hey Ron, I just got back from a 4 week ride on the Harley with a bunch of my two wheel buddies ---- long ride but it was awesome {and only had to bail one guy out of jail the whole trip
Anyway there are two threads I wanted to look into as soon as I got back and this is one of them --- great to see this build moving along {yup that isky cam is some fine lookin mota porn}

Now I gotta see if I can find Jups resto thread and see how the SX is doin
Gimme Fuel
Well-known member
Ok, More progress last night. First off, meet Mark. He is the brains behind this operation making sure I don't eff anything up. He knows his squit but hates cameras apparently:
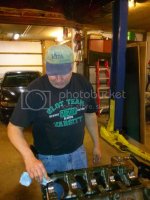
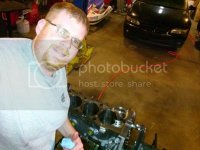
Now, lets post the required selfie of the project....Thanks Coop for starting this trend...ugh. BTW, Cameras hate me too.....
The bump stick from Bob has been slid into place:

Da crank is in!:

Let the ring filing begin:
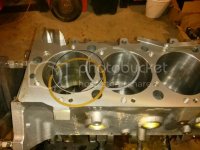
For those of you that have never used a Gapless set of rings, this is what they look like. I am using a Gapless Ductile Iron top ring with a cast Napier second ring and standard tension oil rings. Here you see the profile of the compound top ring and how it is machined to accept a smaller ring against it:

Here I have laid the second "gapless" component ring. When installed on the piston, the gaps will be offset to essentially create a "gapless" ring. They help make power for sure and seal very nicely:
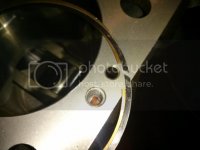
All of the rings are filed and ready to go on pistons:
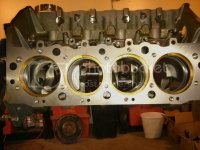
Next update I give, the shortblock should be all together! Just waiting on my heads to be finished by machine shop too. At least my machinist in in Mark's hardware store every other day for bolts so he will keep on him to get them done.
This weekend I am planning on doing a bunch of bilge prep and doing some port matching of my intake manifold.

Now, lets post the required selfie of the project....Thanks Coop for starting this trend...ugh.
 BTW, Cameras hate me too.....
The bump stick from Bob has been slid into place:

Da crank is in!:

Let the ring filing begin:

For those of you that have never used a Gapless set of rings, this is what they look like. I am using a Gapless Ductile Iron top ring with a cast Napier second ring and standard tension oil rings. Here you see the profile of the compound top ring and how it is machined to accept a smaller ring against it:

Here I have laid the second "gapless" component ring. When installed on the piston, the gaps will be offset to essentially create a "gapless" ring. They help make power for sure and seal very nicely:

All of the rings are filed and ready to go on pistons:

Next update I give, the shortblock should be all together! Just waiting on my heads to be finished by machine shop too. At least my machinist in in Mark's hardware store every other day for bolts so he will keep on him to get them done.
This weekend I am planning on doing a bunch of bilge prep and doing some port matching of my intake manifold.
RNGRDVE
Well-known member
http://s734.photobucket.com/user/rfkrawcz/media/540 Efi Build/0520141927_zpsqxj7hfr0.jpg.html
Now, lets post the required selfie of the project....Thanks Coop for starting this trend...ugh.BTW, Cameras hate me too.....
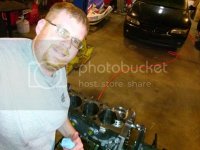
I'd like to go on record stating my beliefs on Selfies. A selfie should never involve pictures. It is something very private that happens between a man and a magazine or movie behind closed doors.
Gimme Fuel
Well-known member
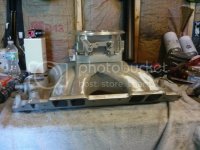
I spent much of this weekend prepping my bilge for paint then applying 2/3 of the first coat. (Couldn't do it all because I can't hover/suspend from harness). I did spend a little time hashing out a few ideas for the intake manifold and EFI components. I also mocked up the heads (that junk casting became very useful) and marked out the ports for matching the intake.

Here is placing the fuel injector bungs. I think life will be easier if I grind down the NOS bungs on the intake first.
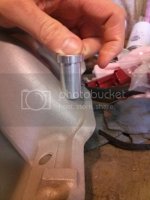
Lil sneak peek of what it is gonna look like:


Here is placing the fuel injector bungs. I think life will be easier if I grind down the NOS bungs on the intake first.

Lil sneak peek of what it is gonna look like:

Gimme Fuel
Well-known member
Gimme Fuel
Well-known member
My 1" carb spacer arrived last night so I could finish mocking up the fuel rails and cut my injector bungs down to the proper height and throttle linkage clearance. Now I just need to have them welded on and finish port matching and cleaning up the intake plenum.
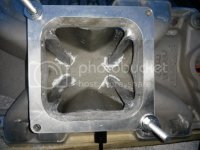
You would think that it being an Edelbrock spacer, it would match up to the intake flange better. NOPE! Looks like I have some clean up to do there also.

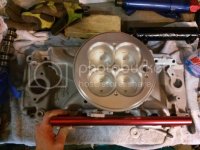
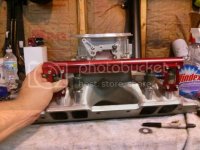
You would think that it being an Edelbrock spacer, it would match up to the intake flange better. NOPE! Looks like I have some clean up to do there also.


Gimme Fuel
Well-known member
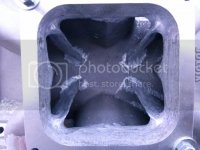
Made some more progress with the intake this weekend. I spent many hours with a die grinder in my hand on Saturday. I was able to rough shape and port the plenum of the intake. Edelbrock leaves some to be desired in that department. The runner dividers were very blunt and thick and edges leading into the runners were sharp/unblended. You can see in previous posts how it looked before. I still need to match the head side of the ports and touch it all up with cartridge sanding rolls. I was using a carbide burr bit so far. I dropped the intake off yesterday for the injector bungs to be TIG welded on.

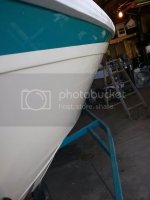
While I was grinding away, My girlfriend Stephanie waxed the sides of the hull with Performance Boat Candy's Crystal Gloss Wax. Turned out nice! She yelled at me when I tried to touch it to see how smooth it was...haha.
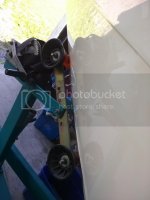
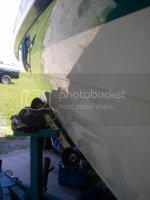
Stephanie also put the last coat of Rustoleum in the bilge while I was grinding. Looks awesome. Now I get to reinstall all of the pumps, wiring, and trim tab hydraulic lines probably Tuesday.
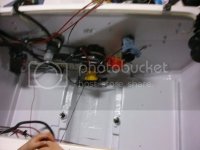
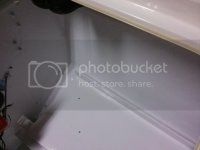
Friday I was able to pick up my cylinder heads from the machine shop. Another large assembly session is scheduled for this evening on the long block. Check in tomorrow for updates on that portion of the program.


While I was grinding away, My girlfriend Stephanie waxed the sides of the hull with Performance Boat Candy's Crystal Gloss Wax. Turned out nice! She yelled at me when I tried to touch it to see how smooth it was...haha.


Stephanie also put the last coat of Rustoleum in the bilge while I was grinding. Looks awesome. Now I get to reinstall all of the pumps, wiring, and trim tab hydraulic lines probably Tuesday.


Friday I was able to pick up my cylinder heads from the machine shop. Another large assembly session is scheduled for this evening on the long block. Check in tomorrow for updates on that portion of the program.
RNGRDVE
Well-known member
Boat looks good but what's up with the POS in the yard? Loose a bet?


