• Welcome to the Checkmate Community Forums forums.

    You are currently viewing our boards as a guest which gives you limited access to view most discussions, articles and access to our other FREE features.
    By joining our free community you will be able to:

    » Interact with over 10,000 Checkmate Fanatics from around the world!
    » Post topics and messages
    » Post and view photos
    » Communicate privately with other members
    » Access our extensive gallery of old Checkmate brochures located in our Media Gallery
    » Browse the various pictures in our Checkmate photo gallery

    Registration is fast, simple and absolutely free so please, join our community today!

    If you have any problems with the registration process or your account login, please contact support by clicking here or by using the"contact us" link at the bottom of the page.

540 EFI Build-up Thread

Yeah, I run flat tappet cams in my Grand National and they are a pain. For break in on those I run 20w 50 Kendall (some sticky S#%T!!) with a bottle of zinc additive just long enough to break the cam in. The sticky Kendall grabs a lot of the residue left from assembly. Then I change the filter and go to Mobil 1 synthetic with zinc additive for about 500 miles and do another change, then its game on!!! I put zinc additive in with every oil change.
 
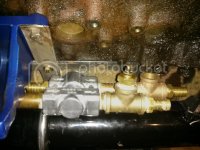
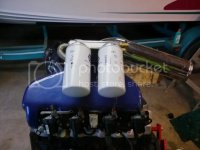
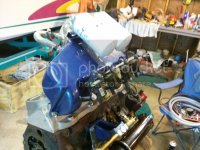
I went ahead and made a mock up engine so I can build the bracket for my oil cooler and get the thermostat plumbing figured out. I decided to attach the thermostat to the cooler by hard piping to eliminate the need to build another bracket and make more of a plumbing mess. It looks like a pipefitter gone wrong but I will paint it to match cooler and it is hidden under the manifold. It is all so big that it is tight with the block adapter but Im sure it will work by changing one fitting on the adapter to a 90 degree. That is a heavy cooler for sure. I just have the bracket bolted together for now but will weld it solid this weekend. Holds it fairly solidly now after I modified it from the original concept a bit.

0624142114a_zpsjdafq5jy.jpg

I have the t-fittings set up to hold oil thermostat senders. I have one coming out of engine and another going back into engine after t-stat and cooler to measure delta oil temps too.
0624142114b_zpsq2yxxmmy.jpg

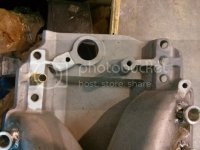
I drilled and tapped the rear water ports of my intake so I can tie them to the front ports to eliminate steam pockets from forming in the back of the heads.
0623141923_zpsydsz2ogn.jpg

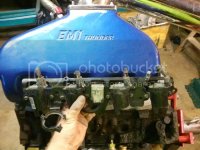
Tonight's project is to make the LS coil brackets fit where I want them too. I had to move them a bit from my original intentions but this still keeps them off of the top of the motor and allows me to use standard pickup length wires.
0624142127_zps7e4jtlpv.jpg
 
Looking good Ron and movin along nicely. Wont be long and Ross will need to start working on his new signature. Really enjoying this build. I have never touched EFI performance motors and find it very interesting . You will be burning some fuel before long. :cheers:
 
Got a good plan down for the coil brackets. Man was this a total PITA to figure out so it looks right. Only problem I had is the 7 lbs of various length bolts I bought yesterday none were long enough. There just wasn't a meaty part of the bracket that lined up with any of the manifold bolt locations. I do have to make one small bracket for the rear mounting bolt. These are the hotter "round heatsink" coils so the myriad of aftermarket LS coil brackets don't fit these at least the ones I've come across. But this will look decent when I get the right bolts, be solidly mounted, and make my small linkage. I am basically using a very long bolt in two of the manifold mounting holes and cutting a piece of metal tubing to act as a spacer between the manifold and the bracket. I don't like the looks of going to threaded rod although it would make things much easier. Boy am I a glutton for punishment. Thank you sir, may I have another.....

0625142058_zpsgf8h81lu.jpg
0625142058a_zpshwi4ookq.jpg
 
nice job !! what ECM are you going to use ? where are you putting the 02..good luck Rob
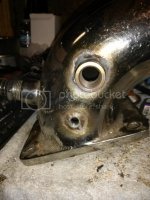
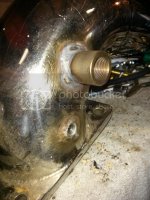
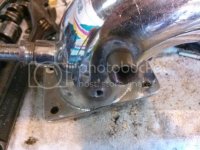
Thanks! The ECM will be Holley's HP series self tuning controller. It will be set up for sequential multiport operation along with the coil on plug ignition. I am putting the O2 sensor in the riser very close to the manifold. I already have one O2 bung in one riser and a pyrometer in the other. I just added a second O2 sensor for the new EFI controller in the other riser. I used Eddie Young's "Ballpein Hammer" method where you drill through both jackets (I used a big step bit), insert ballpein end of hammer into the hole, hit with another hammer bending the outer jacket against the inner. You then weld those two jacket walls together solid. Then place the bung on top and weld that to the outer jacket wall. The welder and I had it done in 15 minutes from start to finish. He did a beautiful job TIG welding it in and only charged $20. The bung was made by Innovation Motorsports. Eventually when I get time I need to polish these risers and bungs back up but that is another day after it is running.

0629141613_zpsr4nsx4xw.jpg
0629141612c_zpszrybymie.jpg
0629141612b_zpsfi7fnyfv.jpg


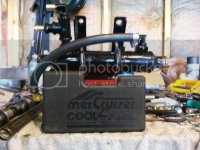
I got the "Cool-ER Fuel" system done. I did a little bit of trimming of the factory plastic cover and attached it with some large Velcro. No rattle and solidly holds yet easily removable.
0629141543a_zpsjybbigpv.jpg
0629141608_zpsfwtfheej.jpg

For the ignition coil brackets, I decided to go a bit outside of the box and make an individual bracket for each one. The factory bracket just wouldn't fit right no matter how I oriented it. I ended up making eight little brackets and eight little spacers that along with longer manifold bolts, create the mounts for the coils. I think it looks nice and neat.
0628141935a_zpsd0nyrl9i.jpg

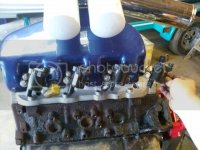
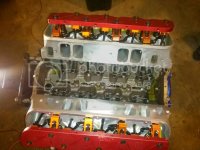
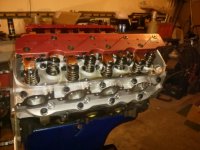
I received the custom length .120 wall Manton pushrods in the mail on Friday and will be installing and adjusting the valvetrain tonight. That is the last of what will be done at my friend's engine shop so it will also be coming home tonight. I have it scheduled to be painted tomorrow and start bolting things to it Wednesday. Hopefully the EFI components will arrive this week. Keep your fingers crossed!
 
Last edited:
is that the water dump feed just below the 02 bung ?

No, that is a bung for a pyrometer probe. Water dumps into exhaust stream ~20 inches away from sensors. Never had a problem with sensor getting water on it in this location on other pipe even with 2 hour long no wake zones. This cam is larger though but about same centerline.
 
The Eagle has landed! It is home finally!
0630142345_zpsqdkhwunu.jpg

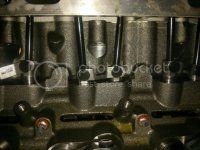
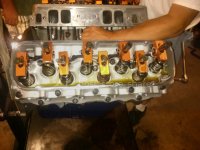
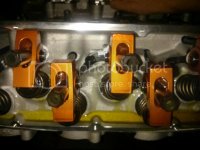
Few pics from finishing up the valvetrain: One issue we ran into using the Dart Adjustable Guideplates was the webbing between the rocker studs on two cylinders interfered with the guideplate adjustment nut. Ended up having to flip the socket cap screw upside down and grind a flat spot on the head to gain enough adjustment to satisfy roller tip position on the stem. The "V2" newer head had reliefs cut into this web for this reason right from the factory:
0630142017_zpslmyjfyhd.jpg
0630142014_zpsoagkpweu.jpg
0630142014a_zps4enevsle.jpg

Stud Girdles installed: With one head being the older casting of the AFR 335 CNC and one of the "V2 335 CNC" there was a slight valvetrain geometry change that was evident with the difference in resting position of the stud girdles. No alignment or interference issues, just something interesting to note:
0630142057b_zpsc6igyuvx.jpg
0630142057a_zpshxqvkpad.jpg
0630142057_zpsurygy7l7.jpg
0630142057b_zpsc6igyuvx.jpg

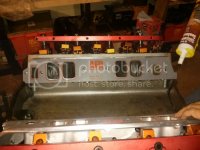
The Intake going on: Ran into some more issues that fought us here. The intake bolt threads tapped into the new head sucked. Ended up having to chase 3 of them with a tap and working the intake bolts in and then backing out. It was a pain because we didn't want to remove the intake so clearance was tight for a tap:
0630142104_zpsvhwicmp6.jpg
0630142242_zpsxfqyj95u.jpg
 
I am currently looking into options for upgrading my fuel system on my Procharged 502 mag. One of the items that looks promising is the Holley controller such as you working with.

Build looks great! Good luck and hope to see you on the water soon.
 
I am currently looking into options for upgrading my fuel system on my Procharged 502 mag. One of the items that looks promising is the Holley controller such as you working with.

Build looks great! Good luck and hope to see you on the water soon.

Go to Holley's website and watch the videos that are on there. The self tuning ability is amazing. The datalogging and real time tuning ability and ease is impressive. With engine running it highlites the cell of the fuel table that the ecm is referencing at any given second. I cant wait to get mine and play with it. Call up Bob Madera and Alex Haxby. They have best prices on it.
 
Back
Top