• Welcome to the Checkmate Community Forums forums.

    You are currently viewing our boards as a guest which gives you limited access to view most discussions, articles and access to our other FREE features.
    By joining our free community you will be able to:

    » Interact with over 10,000 Checkmate Fanatics from around the world!
    » Post topics and messages
    » Post and view photos
    » Communicate privately with other members
    » Access our extensive gallery of old Checkmate brochures located in our Media Gallery
    » Browse the various pictures in our Checkmate photo gallery

    Registration is fast, simple and absolutely free so please, join our community today!

    If you have any problems with the registration process or your account login, please contact support by clicking here or by using the"contact us" link at the bottom of the page.

86 Exciter Resto

If the stringers are the outside walls of the tank well, why not cut open the floor on the outer side of the stringers and glass the knee boards to the outer side of the stringers instead of cutting them forward. Then put the floor back in. If the stringers are good why not leave them in place?
 
If the stringers are the outside walls of the tank well, why not cut open the floor on the outer side of the stringers and glass the knee boards to the outer side of the stringers instead of cutting them forward. Then put the floor back in. If the stringers are good why not leave them in place?


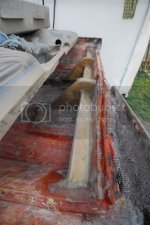
So... I'll cut the old knees out, throw the horizontal support/strong back in the trash and cut open the floor outside the stringers. I will laminate three pieces of 1/2" ply for new knees. Should I screw them to the stringers? What do you think of the idea I did on the strong back? waste of time to do it again in one piece or worth while?
 
IMO it would have been much easier and stronger if you had removed the knees so the strongback would have been one piece. The knees attached to the floor and not the bottom of the hull as part of the stringers really don't add much support. From a fabricators standpoint, they are useless the way the factory installed them.
I was thinking the same thing. Good call JT.

The good thing about the forum is there is always input from others to help and guide for the best possible outcome. It is looking good tho so far!:bigthumb:
 
So... I'll cut the old knees out, throw the horizontal support/strong back in the trash and cut open the floor outside the stringers. I will laminate three pieces of 1/2" ply for new knees. Should I screw them to the stringers? What do you think of the idea I did on the strong back? waste of time to do it again in one piece or worth while?


I would Glue, Screw, And Glass them to the stringers. Make the knee boards much larger. bring them up along side the tank if possible. Not sure about the Strong back. If you make the knee boards large so that an exact fit slot for the strong back will not weaken the knee boards I don't think it would hurt to have one. Not an outboard guy some more opinion might be in order on the strong back. Does the transom on an out board need to be able to flex some or should it be as rigid as possible? Are you running a massive motor?
 
The strongback is there to minimize transom twisting from the torque of the motor. Or at least that's my understanding. So add both JT and Jetmate's ideas together, all the extra strength you'll need for the jackplate/motor combo.:thumb:
 
I would Glue, Screw, And Glass them to the stringers. Make the knee boards much larger. bring them up along side the tank if possible. Not sure about the Strong back. If you make the knee boards large so that an exact fit slot for the strong back will not weaken the knee boards I don't think it would hurt to have one. Not an outboard guy some more opinion might be in order on the strong back. Does the transom on an out board need to be able to flex some or should it be as rigid as possible? Are you running a massive motor?


Thanks Jetmate, I wasn't sure if I should put screws in or not. The massive engine will go on in a year or two...
 
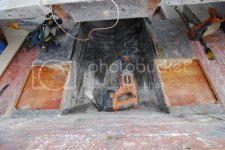
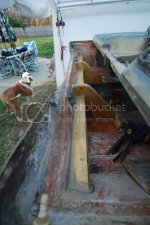
Started today by pulling yesterdays work out and cutting the floor open. There is no way to add any material to the inside of the stringer, other than fiberglass. The gas tank sits about 1/4" away from the stringer on both side. I pulled the tank out to make the job a little easier.

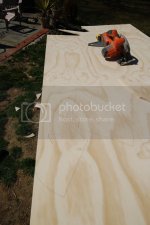
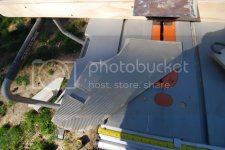
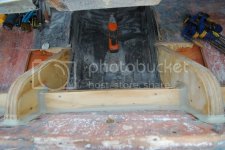
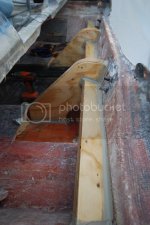
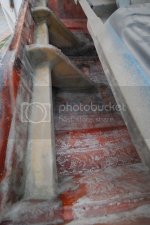
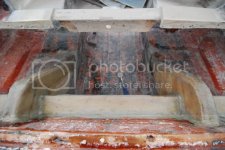
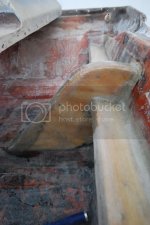
I made a template for the new knee and made the needed corrections. Once it fit well, I layed it out on the plywood and cut them all out. I decided not to make the strong back as I did yesterday. As it sits now, the strong back is 3/4" wider and 1/2" thicker and the knees are a full 1" wider and tied into the stringers. I didn't think I would need any extra support when I'm done.

When I glued the layers together, I used PL Premium and a v-grooved trowel to get a nice even spread. Once all of the layers were together I clamped and screwed them with SS screws.

I used the PL premium to round all of the inside corners, along with adding addition strength (i think)

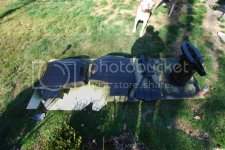
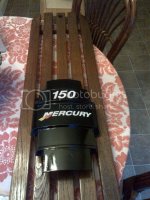
I also found time to get two coats of primer and one coat of paint on the engine components I'm painting. I will sand them and apply one more coat of black before clear coating them.

813.jpg

812.jpg

811.jpg

86.jpg

87.jpg

82.jpg

89.jpg
 
Last edited by a moderator:
Looks great to me. I was just thinking about suggesting adding a short section of knee board to butt fit on top of the stringers and I see you have already done that. Now you glass on both sides of the stringers. Looks strong to me. What do the rest of you guys think? YF, how's it looking to you?
 
I'm putting together a material list for anything/everything I think I'll need. The hull and deck putty that was between the top deck and transom where the engine mounts should be replaced, correct? If so, what would be the best product to put in there?
 
Looks great to me. I was just thinking about suggesting adding a short section of knee board to butt fit on top of the stringers and I see you have already done that. Now you glass on both sides of the stringers. Looks strong to me. What do the rest of you guys think? YF, how's it looking to you?
Looking great :bigthumb:
 
Todays progress... not as much as I would have liked, but yet again a morning delay. We had some out of town relatives drop in on us this morning. We ended up going to breakfast, so I didn't get started until 11:30.

I got the transom all glassed in along with the floor. I found out I did things the difficult and/or wrong way. If anyone has any suggestions please let me know. I played H**L trying to get the 24 oz 1708 tight on all corners and surfaces. I did it all with 1708 in one piece per section. NOTE: this is my first time doing glass work...

BTW...I hate fiberglass work:brickwall:

I also finished up sanding the floor and bilge. Tomorrow I will start to level out the floor in prep of the gel coat after I finish up on the glass work. I will also make up the rest of the interior boxing ect and put the decals on the engine cowls! Hopefully I can manage to get an early start!

9.jpg

93.jpg

91.jpg

95.jpg

94.jpg
 
Not bad for your first time!! Looks good!! :thumb:The only thing I see is those whites spots on the floor, looks like the mat didn't get soaked completely in resin. The mat should be transparent when soaked in resin. That same thing happen to me as well, never could figure out why until someone told me.:(
 
Not bad for your first time!! Looks good!! :thumb:The only thing I see is those whites spots on the floor, looks like the mat didn't get soaked completely in resin. The mat should be transparent when soaked in resin. That same thing happen to me as well, never could figure out why until someone told me.:(

There were some spots that didn't adhere completely, but I went back over them with additional resin and they went away. I think the white spots you're seeing are from the dust. I dusted everything out when I finished sanding the floor and didn't vacuum it all out before the pics.
If there are spots that I see tomorrow that didn't adhere completely should I do anything to them?

I thought maybe the camera angle or the way it takes pictures. My camera does stuff like that. The area is small so worse case just grind the white spots out and add a layer of CSM over it. What I found out is the 1708 uses alot of resin and needs to be completely saturated.
 
Spencer , thank's for the link and to tell you the truth i think everything would have been a little easier if .............you would have tried to do everything in steps and please do not take this the wrong way just an obversation ....... considering this is the first time you have done this type of work which sometimes can be very overwhelming for some one .
 
Spencer , thank's for the link and to tell you the truth i think everything would have been a little easier if .............you would have tried to do everything in steps and please do not take this the wrong way just an obversation ....... considering this is the first time you have done this type of work which sometimes can be very overwhelming for some one .

No offense taken... when you say steps, what do you mean? I'm open to any advice on things yet to be done and things I have already done. Never too late to learn:cheers:
 
Back
Top