-
Welcome to the Checkmate Community Forums forums.
» Interact with over 10,000 Checkmate Fanatics from around the world!
You are currently viewing our boards as a guest which gives you limited access to view most discussions, articles and access to our other FREE features.
By joining our free community you will be able to:
» Post topics and messages
» Post and view photos
» Communicate privately with other members
» Access our extensive gallery of old Checkmate brochures located in our Media Gallery
» Browse the various pictures in our Checkmate photo gallery
Registration is fast, simple and absolutely free so please, join our community today!
If you have any problems with the registration process or your account login, please contact support by clicking here or by using the"contact us" link at the bottom of the page.
You are using an out of date browser. It may not display this or other websites correctly.
You should upgrade or use an alternative browser.
You should upgrade or use an alternative browser.
'88 Starflite Resto (SOLD)
- Thread starter BADBK
- Start date
- Status
- Not open for further replies.
BADBK
Well-known member
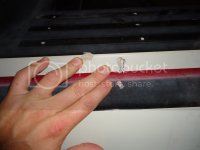
Rubrail off... what a PITA...
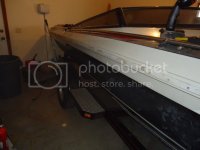
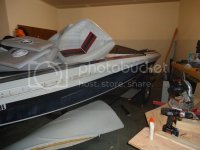
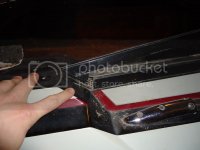
Rub rail off, transom area
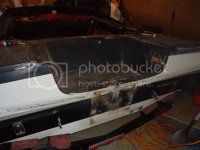
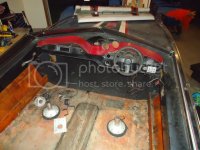
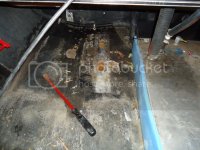
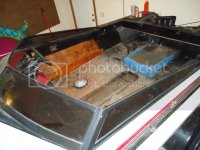
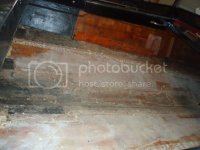
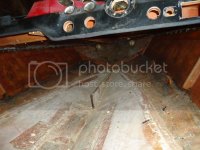
Floor out.
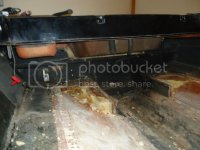
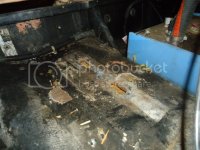
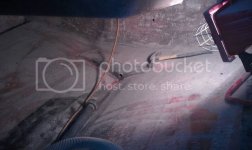
Transom removal
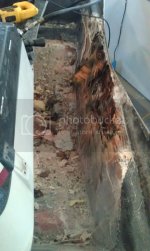
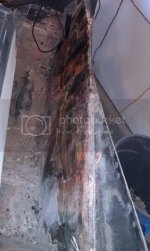
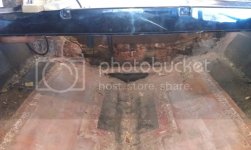
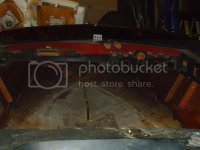
Transom OUT!! Whole bunch of awesomeness!
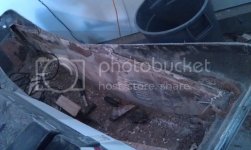
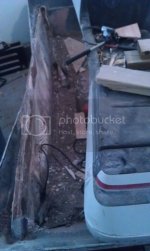
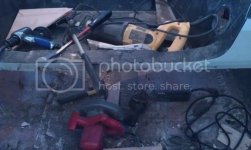
Tools very helpful in the removal process... Skill saw a MUST. RotoZip saw helped a bit, pry bar, big fuggin hammers, air chisel was also pretty useful.
When removing the transom cmpulse170 told me to try to "pop" or seperate the rear skin from the transom. Worked AWESOME, thanks cmpulse170! Put 1/4" wood shims in, set the skill saw and made it work! I did a lot of extra work trying to chip it out, next one would be muuuuch easier!


Rub rail off, transom area

Floor out.


Transom removal


Transom OUT!! Whole bunch of awesomeness!


Tools very helpful in the removal process... Skill saw a MUST. RotoZip saw helped a bit, pry bar, big fuggin hammers, air chisel was also pretty useful.

When removing the transom cmpulse170 told me to try to "pop" or seperate the rear skin from the transom. Worked AWESOME, thanks cmpulse170! Put 1/4" wood shims in, set the skill saw and made it work! I did a lot of extra work trying to chip it out, next one would be muuuuch easier!
BADBK
Well-known member
Are you going to make it a lipless splash well?
I've asked myself that a dozen times.... what's a little more a$$ pain/work eh?
Don't know quite yet.
Also not sure what I'm going to do ply vs. composite. 520 miles one way to fargo.... 16-20 hrs rd/trip. Did you see if they had any more 2" 30 lb pieces and 1/2" 5x10's?
Sam I am
Well-known member
I've asked myself that a dozen times.... what's a little more a$$ pain/work eh?
Don't know quite yet.
Also not sure what I'm going to do ply vs. composite. 520 miles one way to fargo.... 16-20 hrs rd/trip. Did you see if they had any more 2" 30 lb pieces and 1/2" 5x10's?
I can look for you. I won't be able to until Friday. After that I'm gone for 2 weeks again.
pony3xp
Active member
Keep it Going!
BADBK, keep going!!
Here is my thread from years ago......
http://checkmate-boats.com/forums/showthread.php?t=10477
And that is where it still sits today .
.
I'm fixing it this year for sure (yea, right).
Tell me about the "popping the transom" trick? I wasn't going to replace mine but I think I might have to after looking at yours.
Also, what are you going to do with the spider cracks, i have a ton on the top of mine. Are you going to paint it or try and bring it back to life as is?
Take lots of pics
Thanks for the motivation!
BADBK, keep going!!
Here is my thread from years ago......
http://checkmate-boats.com/forums/showthread.php?t=10477
And that is where it still sits today
I'm fixing it this year for sure (yea, right).
Tell me about the "popping the transom" trick? I wasn't going to replace mine but I think I might have to after looking at yours.
Also, what are you going to do with the spider cracks, i have a ton on the top of mine. Are you going to paint it or try and bring it back to life as is?
Take lots of pics
Thanks for the motivation!
BADBK
Well-known member
I can look for you. I won't be able to until Friday. After that I'm gone for 2 weeks again.
Would be great if you had a few extra minutes to check it out, if not, no biggie.
BADBK, keep going!!
Here is my thread from years ago......
http://checkmate-boats.com/forums/showthread.php?t=10477
And that is where it still sits today.
I'm fixing it this year for sure (yea, right).
Tell me about the "popping the transom" trick? I wasn't going to replace mine but I think I might have to after looking at yours.
Also, what are you going to do with the spider cracks, i have a ton on the top of mine. Are you going to paint it or try and bring it back to life as is?
Take lots of pics
Thanks for the motivation!
Scrape/chisel as much deck/hull putty out/away as you can, put a floor jack in it, jack up on the splash well gently using some plywood and 2x8's to spread the load and give'r hell! I jacked mine up and down a few times out of concern I was going to make myself more work, but gave it one extra pump and it popped right off.
I'm going to dremel out the spider cracks to 1/4" - 1/2" width then fill with either dyna-glass or west system 410. Anyone recommend either or?
It will be a full custom paint. I'm going to give metal flake a shot, wish me luck!
Forgot how awesome grinding fiberglass, putty and funk was... 4 1/2" grinder with 36 grit wheel sure helps get the job done though!
More work/pics tomorrow.
Been there done that!!!!
 You got a good respirator?
BADBK
Well-known member
Been there done that!!!!The 36 grit makes quick work when grinding!!
You got a good respirator?
On order yes...
 I use the el cheapo paper masks but have a well ventilated garage along with a shop vac going strategically placed to try and eliminate a lot of the dust.
Forgot to ask did your boat have those floatation boxes in the back corners?
Since I have no idea what that is, I'm guessing no....

On order yes...I use the el cheapo paper masks but have a well ventilated garage along with a shop vac going strategically placed to try and eliminate a lot of the dust.
Since I have no idea what that is, I'm guessing no....
Looking at the pictures again it seems your boat didn't have them. The boxes were located in the corner of transom and hull filled with foam. They held water because of not having tops. I think the smaller boats have them.
bigredinohio
Active member
I'm going to dremel out the spider cracks to 1/4" - 1/2" width then fill with either dyna-glass or west system 410. Anyone recommend either or?
You're doing a great job!
I would recommend that you add some glass reinforcement on the back side of the cracks to help prevent them from coming back. I haven't used any of the products you listed above so I can't offer an opinion.
BADBK
Well-known member
Badbk have you removed you windshield yet is so can you explain how I'm in the middle of the same build
Not yet.... let me know when you get it figured out!
caliburn
Active member
cracks in the glass
Hi im restoring my 86 Starflite and this is a issue of mine as well, are cracks in the gel coat or do they go through into the fiberglass, I have no clue to this or the method of repairing them on my boat, was going to sand them down and use bondow glass will this work? any info would help and I plan to re-gel coat the entire boat, never done it befor so any info would be of great help, thanks.
Would be great if you had a few extra minutes to check it out, if not, no biggie.
Scrape/chisel as much deck/hull putty out/away as you can, put a floor jack in it, jack up on the splash well gently using some plywood and 2x8's to spread the load and give'r hell! I jacked mine up and down a few times out of concern I was going to make myself more work, but gave it one extra pump and it popped right off.
I'm going to dremel out the spider cracks to 1/4" - 1/2" width then fill with either dyna-glass or west system 410. Anyone recommend either or?
It will be a full custom paint. I'm going to give metal flake a shot, wish me luck!
Hi im restoring my 86 Starflite and this is a issue of mine as well, are cracks in the gel coat or do they go through into the fiberglass, I have no clue to this or the method of repairing them on my boat, was going to sand them down and use bondow glass will this work? any info would help and I plan to re-gel coat the entire boat, never done it befor so any info would be of great help, thanks.
caliburn
Active member
windshield
I have a 86 Starflite I am rebuilding, My first rebuild, do you need to know to remove the glass or the entire windshield? on mine the left side glass was broke, under the bottom of the frame there are mounting bolts that go through the top half of the boat and are secured by nuts, half of mine were rusted out and I had to use a dremel to grind them down to the bolts, I then used a putty knife to seperate the two way tape under the entire windshield, it is hinged in half so I pulled mine off in two pieces, to remove the glass that was broke, I had to remove the 1 screw to seperate the front half from the side that is hinged as well, if you have caulking it will have to be removed as well as the rivets will to there are glass shims in the frame that come out easy, hope this helps.
Badbk have you removed you windshield yet is so can you explain how I'm in the middle of the same build
I have a 86 Starflite I am rebuilding, My first rebuild, do you need to know to remove the glass or the entire windshield? on mine the left side glass was broke, under the bottom of the frame there are mounting bolts that go through the top half of the boat and are secured by nuts, half of mine were rusted out and I had to use a dremel to grind them down to the bolts, I then used a putty knife to seperate the two way tape under the entire windshield, it is hinged in half so I pulled mine off in two pieces, to remove the glass that was broke, I had to remove the 1 screw to seperate the front half from the side that is hinged as well, if you have caulking it will have to be removed as well as the rivets will to there are glass shims in the frame that come out easy, hope this helps.
- Status
- Not open for further replies.


