• Welcome to the Checkmate Community Forums forums.

    You are currently viewing our boards as a guest which gives you limited access to view most discussions, articles and access to our other FREE features.
    By joining our free community you will be able to:

    » Interact with over 10,000 Checkmate Fanatics from around the world!
    » Post topics and messages
    » Post and view photos
    » Communicate privately with other members
    » Access our extensive gallery of old Checkmate brochures located in our Media Gallery
    » Browse the various pictures in our Checkmate photo gallery

    Registration is fast, simple and absolutely free so please, join our community today!

    If you have any problems with the registration process or your account login, please contact support by clicking here or by using the"contact us" link at the bottom of the page.

Stringer repair (winter project)

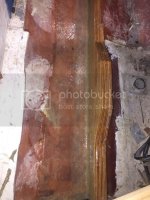
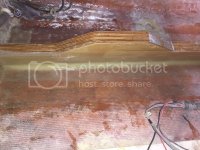
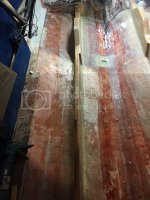
I started with the port side stringer since that is the easy side.
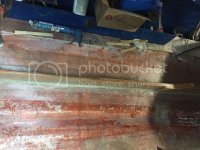
Since I'm working with epoxy I decided to for go the mat and just apply three layers of 1700 biaxial cloth. This stuff is so hard to wet out and work with but I think it will be very strong and waterproof when done.
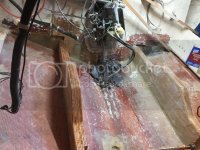
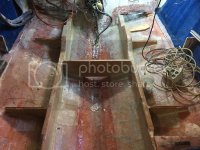
I also decided to redesign the motor mount support. I'm going to incorporate it into the stringer and triple up the 3/4" plywood in the engine bay. This way I can thru bolt an aluminum angle right to the stringer. This will also give me a little more room to work around the motor.
04F5E48A-E1CC-4B8D-91C4-2AD52367E816.jpg
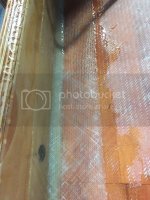
Peanut butter fillet and one layer of biaxial cloth
5AEA9CFC-34DC-4611-8588-C0923EECB18D.jpg
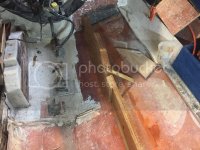
Peanut butter fillet and One layer of biaxial cloth
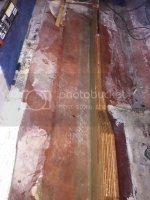

9761FA18-50C5-4FCF-840F-48F138C4FFC4.jpg
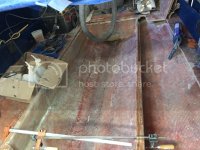
Two layers of biaxial cloth

7382AE41-9BC6-486E-997E-FDD0A5A0DCBA.jpg
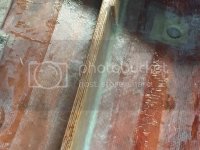
Two layers of 1700 biaxial cloth added.


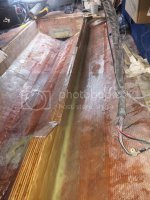
Well I figured out that I'm not the best at applying epoxy and cloth. This 1700 is so hard to work with but should be very strong when finished. This is three layers and the stringer is fully encapsulated now. I had to piece in a few little sections so I need to clean it up a bit:
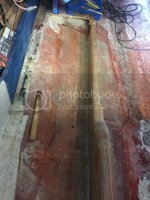
0301A552-5553-4FC6-AE21-67A05F8A4897.jpg
 
Not sure how far you have gotten but just a little info, if you follow Rob B's advice of using oak for the motor mount bed ( great advice) make sure you use white oak. Red oak rots OUT MUCH faster. White is rot resistant.

Thanks for the advice but as you can see I decided to go rogue! Lol
 
I posted this as a reply to you comment on my thread... but in case you didnt see it...it may help....

Seems like the more I lay the worse it gets. I measure the weight of the cloth and mix the resin to match the weight of the cloth plus the amount the roller sucks up. I am using 6" rollers for trim work that I got at lowes. I was using the foam ones then found the mat/cloth rollers work better without falling apart. You can lean on them more. I also roll the resin on the back of the 1708 before I lay it. It helps to break down the binders of the mat and pre saturates the materal. Works much better that way. I also use a bondo spreader to squeeze out the air after i have it rolled down,then roll back over it to make sure it is laying down good. It will look awesome and then after it cures theirs always some air bubbles that pop back up.
 
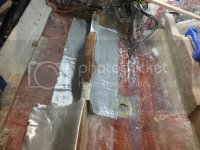
Starboard side stringer is glued and drying. Next step is to add the fillet and start glassing it in.

I did run into a small hiccup. The very corner of the first layer of my transom had some wetness in it. I cut it out until I had solid/ dry material. Whats weird is that the layer behind it was solid and looked like it had a coating of fiberglass on it. Not sure if that is how they glue them together.
Anyway, it looked like the end of the stringer wicked into that part of the transom. I also drilled about a dozen 1/4" holes every 2" to 3" on the inside (around the bad area) to check the condition of the rest of the transom. Everything looked nice and solid and dry. You can see in one of the photos the area I scabbed in a piece of ply.

Oh, and don't be deceived by the darker transom area to the outside of the stringers. I used thickened epoxy there and all I had on hand for wood flour was walnut and cherry which really darkened it up.

Also in the photos you can see the tripled up section in the engine compartment, which is 2 1/4" thick. I think this will be plenty strong enough to thru bolt my mounts. Looking around at how other places do this kind of setup they are usually just doubled up 3/4" plywood.

I'm going to install these motor mounts, http://www.marineindustrieswest.com...=2a90007-85c66cf8-aa70-4817-8d0f-6646a774ec50 with an aluminum backing plate.

Everything and I mean everything has a coating of fiberglass dust on it.

ED000C01-9D30-46F1-A6C2-D4F947916B41.jpg

06DCCE0E-DB5F-4753-BB3E-14421AE70D8C.jpg
 
I posted this as a reply to you comment on my thread... but in case you didnt see it...it may help....

Seems like the more I lay the worse it gets. I measure the weight of the cloth and mix the resin to match the weight of the cloth plus the amount the roller sucks up. I am using 6" rollers for trim work that I got at lowes. I was using the foam ones then found the mat/cloth rollers work better without falling apart. You can lean on them more. I also roll the resin on the back of the 1708 before I lay it. It helps to break down the binders of the mat and pre saturates the materal. Works much better that way. I also use a bondo spreader to squeeze out the air after i have it rolled down,then roll back over it to make sure it is laying down good. It will look awesome and then after it cures theirs always some air bubbles that pop back up.


Thanks for the advice it will come in very handy!
Anything else you want to share please post it. I appreciate any knowledge!
 
I posted this as a reply to you comment on my thread... but in case you didnt see it...it may help....

Seems like the more I lay the worse it gets. I measure the weight of the cloth and mix the resin to match the weight of the cloth plus the amount the roller sucks up. I am using 6" rollers for trim work that I got at lowes. I was using the foam ones then found the mat/cloth rollers work better without falling apart. You can lean on them more. I also roll the resin on the back of the 1708 before I lay it. It helps to break down the binders of the mat and pre saturates the materal. Works much better that way. I also use a bondo spreader to squeeze out the air after i have it rolled down,then roll back over it to make sure it is laying down good. It will look awesome and then after it cures theirs always some air bubbles that pop back up.

Thanks for the advice it will come in very handy!
Anything else you want to share please post it. I appreciate any knowledge!

I dont see it mentioned here so I will bring it up - get a ribber fiberglass roller and use it. After you first roll the resin on a heavy cloth like 1708 with a saturated foam/nap to the point you think you are 2/3's wet out, use the ribber roller. The resin will slowly break down the binders in the cloth and the ribbed roller will help that process. Your resin will start going further that further that you expect which results in a lighter, and better repair! Rushing to get wet out and not giving time for the resin to work into the cloth will force you to use more resin than needed.

I have started laying the 1708 out flat in it's final position, folding half back, rolling the substrate with resin, laying the folded back cloth down down, and doing the same to the other half. I give it a decent once over with a resin saturated roller and then hit it with the ribbed roller for a couple minutes. Only then do I add more resin - I was unsure of this method but now that I have used it I think it's much better than doing all of the rolling with a saturated soft roller.
 
What size ribbed roller are you using? There are so many different diameters and lengths. Hopefully this will help with my epoxy consumption because I think I'm a little heavy.
I'm using biaxial cloth and epoxy so I do not have to worry about breaking down the binders.
 
I use a 6" roller, 1/2" diameter - just for the larger flat areas. I have not messed with a corner roller.

You may not see as many gains if your are using epoxy (no CSM). I have had luck getting a big dry erase board (4x8 sheet), and partially wetting the cloth out on that, squeegeeing it to remove excess resin, then transferring it to the part I'm making. Of course I was using tight woven carbon fiber and had a second set of hands so it was a little easier to move than a big sheet of wet bi-ax
 
Spent some time this week installing the starboard stringer. Just need to clean it up a bit then I will start making some ribs. I'm adding a total of four ribs (2 each side) to help support the floor, since I'm not replacing the foam I took out.

I'll say it once again "glassing isn't too fun" and I'm sure no one would hire me as a 'layup' guy.

First and Second layer of Biaxial Cloth

IMG_2435.jpg

IMG_2434.jpg

IMG_2431.jpg

IMG_2429.jpg

Getting ready for final layer of cloth.

IMG_2436.jpg

Stringer is now total encapsulated. Done for the day!

IMG_2438.jpg
 
Getting close! Got my misc. crossmember and ribs in today and took measurements for the new floor.

I think I'm going to go ahead and "bilgekote" the entire understructure before installing the floor.

IMG_1555.jpg
 
Here are 2 dilemmas that I'm currently thinking about. Maybe someone can give me some advice.

First - The other day I pulled out the fuel tank from storage to clean it up a bit and get it ready to reinstall. While wiping it down I noticed several areas that had deep pits in it. I think the areas that had wet foam resting against it started to corrode the tank I bit. It isn't terrible and there is no signs at all of a leak anywhere on the tank, but it just gives me pause about using the tank.
I checked with Kip and they do not have any tanks for the boat any longer. So I would have to have one custom made....yikes!
Not sure what to do. Next time I'm out I'll take some photos to share.

Second - I'm ready to cut out some pieces for the floor. I decided to use 3/4" Douglas Fir marine plywood. I'm trying not to have any fasteners at all holding down the floor, so I will make an epoxy glue to do the job. I might be over think this but is there a certain way to place the plywood if it has a slight curve in it?

Do I want the "crown down" \__/ so the center contacts the stringers and then I weight down the edge that is sticking up? Or is it better the other way "crown up" /--\ and force down the center?

I'm thinking "crown down" because I will be glassing all the edges once the glue sets and this should give it plenty of strength.

Anyone have any thoughts?

Sorry if this is confusing, never was very good at explaining things.
 
Your glass work looks good :bigthumb::bigthumb:

"Crown down" is how I would place the wood. Make sure you have some HEAVY weights if not using a few screws to hold the floor down. I have never gotten weights to work as well as a few screws.
 
Your glass work looks good :bigthumb::bigthumb:

"Crown down" is how I would place the wood. Make sure you have some HEAVY weights if not using a few screws to hold the floor down. I have never gotten weights to work as well as a few screws.

Thanks for the input. I can use screws if I have too at the stringers but at the edges the floor is just embedded in a putty. I think in those areas I can wedge a piece of wood against the top of the boat.
 
Omg!!!:eek::eek::eek:
Got my first quote for a new fuel tank $1,340.00!!!
First I'd pressure test the tank. Then if there are leaks (or potential leaks): JB Weld. Clean the area well, mix up a batch, and put it on the spots with the pitting. Let it harden, and then pressure test the tank.
 
Looking at the tank there are many , many pits on the sides and bottom.

Reading on the internet this is usually caused from the wet foam sitting around the tank. I friend told me about a product that you coat the inside of the tank with. Kinda like a flexible coating.
Jb Weld sounds easier and safer. (thanks for the suggestion Hack)

I just hate the thought of that tank leaking once I get the floor done.
 
The flexible material you mentioned is used in aircraft fuel tanks that are only riveted together, it is referred to as sloshing compound. Much safer than JB Weld. Depending on how deep the pitting is you may seriously think about that replacement. Nothing worse than a fire on a boat. Take it from a ex Coast Guard fire fighter, you just don't walk away if something goes wrong.
Time to think more about the safety of your family/passengers than money.

Thanks!
That's exactly what I'm thinking. I plan to have this boat for many years and would hate for the tank to give out.
I just can't believe how expensive they are.
I'm hoping to get a few more quotes this week or next.
 
Back
Top